Want a contact form for multiple recipients in WordPress? Our WordPress form plugin can do it easily - and for free!

If you are trying to build a WordPress contact form that sends multiple emails to multiple recipients, we’ve got you covered. All you need is the free version of our WordPress form builder, Formidable Forms!
In fact, adding a contact form to WordPress couldn’t be simpler when you use Formidable. All you need to do is create a form and set up your notifications. Once you have your notification email configured, you can send emails to whoever you want.
In this step-by-step tutorial, we’ll show you a few ways to send the same notification to multiple email addresses. Using this method, you could send emails to:
- The person who filled out the form.
- Any member of your internal team.
- Actually... any email address you want!
The best part of all this? It’s 100% free!
But of course, a premium form builder can unlock more features like conditional logic too. So after the main tutorial, we've got a bonus tip: we’ll show you how to set up a WordPress contact form where manually selecting recipients is possible too.
Why use Formidable to make your WordPress multiple email recipient contact form?
There are two main ways to make a WordPress contact form for multiple recipients:
- Code it yourself
- Use a WordPress plugin
Coding a contact form can be difficult. It involves an understanding of pipe characters, form tags, and additional headers, among other concepts.
The well-known contact form plugin, Contact Form 7 (CF7), has guides that allow users to alter the plugin code to change how their mail tab works. Fair warning: a solution like this can cause trouble when updating WordPress in the future.

So why go through all that when you can create a contact form with loads of features for free! This is why Formidable Forms is the clear choice.
There are other options, for example, the paid version of plugins like WPForms and Gravity Forms. But we think it’s pretty hard to compete with the best free WordPress form plugins!
Creating your WordPress contact form for multiple recipients
To get started, first, you’ll need to install and activate our free form builder. Next, you’ll need to create a form. There’s no faster way to do this than with our free contact form template!
If you want to create your form from scratch, make sure to include an email field, a text field for the name, and a paragraph field for the message.
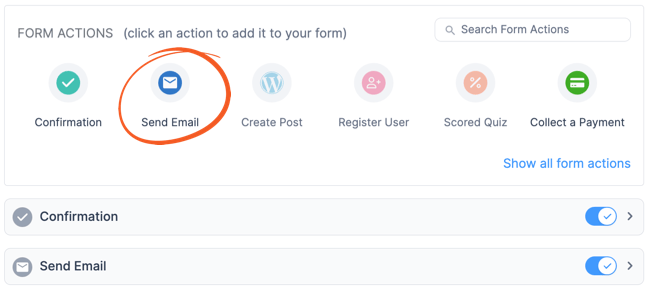
Now, let’s get to the fun part! Click on Settings → Actions & Notifications. Then, click on the Email Notification to start editing it:
Here’s how we can send notifications to multiple recipients. First, you’ll want to locate the recipient's email address who filled out the form. To find that, check the Fields for the shortcode labeled Email Address.

Normally you’d send a form notification to an internal email, and the person who filled out the form. You can send the same notification email by adding multiple addresses in the To field.
Or, you can add your internal email to the BCC field... or even the CC field... or any combination of these three fields.
Of course, you may want to create different mail templates to send to internal and external people. If that’s the case, you can create separate email notification fields for every email you’d like to send.
As you can see, there really are a lot of possible ways to send notifications to as many people as you want!
How to allow users to select recipients in a WordPress contact form
Here’s the bonus we mentioned earlier. Remember, this one will require one of our premium plans.
Let’s say you have multiple departments, and you want to let the user filling out the contact form to choose where the contact form will be sent. All it takes is a little Conditional Logic.
In your form, you’ll need to add at least one more field to make this work. You can use a Radio Button, a Checkbox, or a Dropdown field in this case.
No matter which one you choose, you’ll want to add options like “Sales”, “Marketing”, “Human Resources”, and so on. Also, change the field label to something like “Department”.

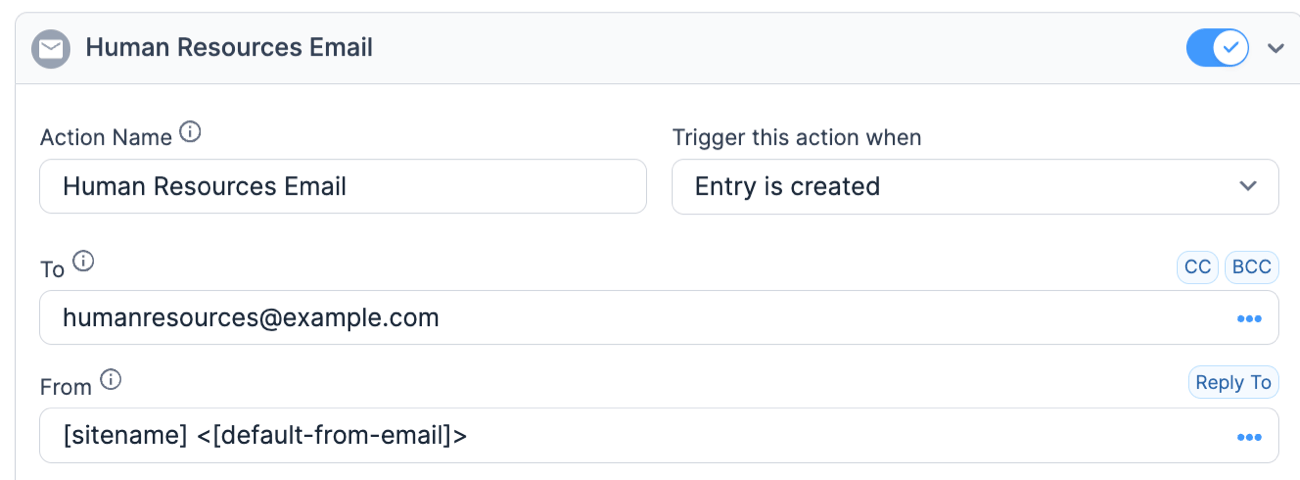
Now, back in the Form Settings tab, add an email notification. Then, enter the desired recipient email address in the To box and message in the Message box, as in the example below:
Now, select Add Conditional Logic. In this example, set 'Department' is equal to 'Human Resources':

Now the email notification will be sent to the Human Resources department only. And you’ll be able to repeat this for all the other departments to make sure the right people get the right emails!
Wrapping up
That was easy, wasn’t it? We think Formidable has one of the most generous free form builders for WordPress, and we really hope you’ll give it a try. At any rate, thanks for stopping by and good luck on your WordPress journey. Bye for now.
Read more of our WordPress forms posts
 How to Create an Ajax Registration Form in WordPress
 How to Create Multilingual Forms in WordPress
 How to Create an Ajax Multi-Step Form in WordPress
 How to Submit a Form Without Page Refresh in WordPress
 How to Save Form Data in Databases in WordPress
 How to Create a Touchless Kiosk for Mobile Forms
 How to Create a Searchable Database in WordPress
 How to Create a Custom Search Form in WordPress
 How to Set Up WordPress Form Notifications
 7 Best Free WordPress Form Plugins [2021]
 How to Add a Signup Form to WordPress
 The Ultimate WordPress E-Signature Plugin
 Why You Need to Translate Your WordPress Forms
 How to Create a GiveWP Donation Form (Plus More!)
 How to Add Email Subscription Forms in WordPress
With our 14-day money-back guarantee, there's no reason to wait a moment longer. Try Formidable now!
The post How to Create a WordPress Contact Form with Multiple Recipients (Free!) appeared first on Formidable Forms.