Capture more leads and convert visitors into paying customers! Here's how to create a call back request form.

A phone service call is a great opportunity to convert potential leads into paying customers. However, it can be difficult to convince visitors to share their contact details.
That's where a request a call back form comes in. By adding this form to your WordPress website, you can encourage visitors to arrange phone calls at convenient times for them, rather than just filling out a simple contact form.
In this post, we'll show you how to capture more leads by adding a call back request form to your WordPress website, using Formidable Forms as the request a call back WordPress plugin. We'll also set up email notifications so that you can act on these leads immediately.
Let's get started!
Step 1: Select the request a call back form template
To make things simpler, we'll be using the request a call back form template.
In your WordPress dashboard, navigate to Formidable → Forms → Add New. In the following popup, you can opt to use a template:

Here, select the Request a Call back template. When you use it with an effective request a call back WordPress theme, this template enables you to create a professionally-designed and high-converting call back form.
To start, give this form a descriptive name, and enter an optional description:

Next, click on Create. Doing this will generate a new form using the Request a Call back template:

Out-of-the-box, this template includes form fields for the potential customer's name, phone number, and a date and time.
You may want to allow a lead to send you a message. If you prefer, you can add this field by clicking on the Paragraph field type in the sidebar, or drag and drop it into the form.
Step 2: Customize the call back form
When it comes to scheduling a call back, you'll want to place the lead firmly in the driver's seat. This setup presents your business as flexible and helpful, which can boost the number of form submissions that you receive. Letting the user choose the schedule can also avoid unnecessary back-and-forth as you find a convenient time.
To let visitors schedule calls during your business hours, simply click the Time fields in the form. Here, you can adjust the start and end times that you would like to offer call backs:
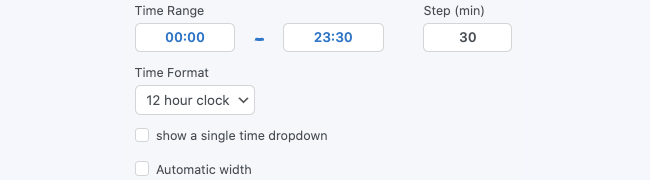
If you only have one agent making phone calls, you can check the Unique box in the time field. This will remove any times that have already been booked for the date.
Now, visitors can choose a time using the dropdown menus. They can also click on the Date field, which will open a datepicker calendar:

Depending on the kind of form you're creating, you may need to insert some additional fields. However, these elements are the essential components of a functioning call back form.
You can also get additional datepicker options to exclude weekends, past dates, holidays, and any other dates that the customer support team might be unavailable.
Finally, you might want to change the form submit button serving as the request a call back button. To change the button name, go the the Settings page for this form, and click the Styling & Buttons tab. Here, you can change the button to something like 'Request My Call Back' for the best lead generation optimization.
You'll also find the success message on this page, on the General tab. You may want to customize this message as well.
Step 3: Set up email notifications
Every call back request is an opportunity to convert a visitor into a paying customer. If you're going to win someone over, it helps to respond quickly. For this reason, you may want to set up email notifications for your call back request form.
To receive messages about each new form submission, select the form Settings tab. Then, in the left-hand menu, choose Actions & Notifications:
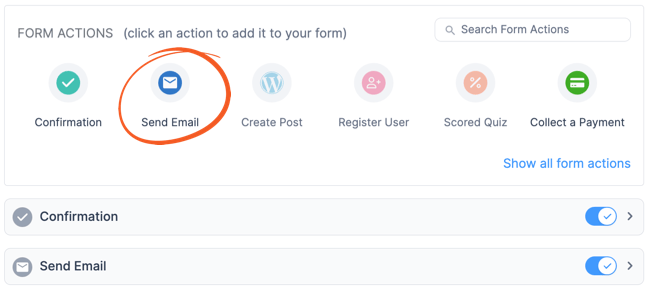
Now, make sure the Email Notification slider is in the ON position. Then, click on the dropdown arrow to expand this section:
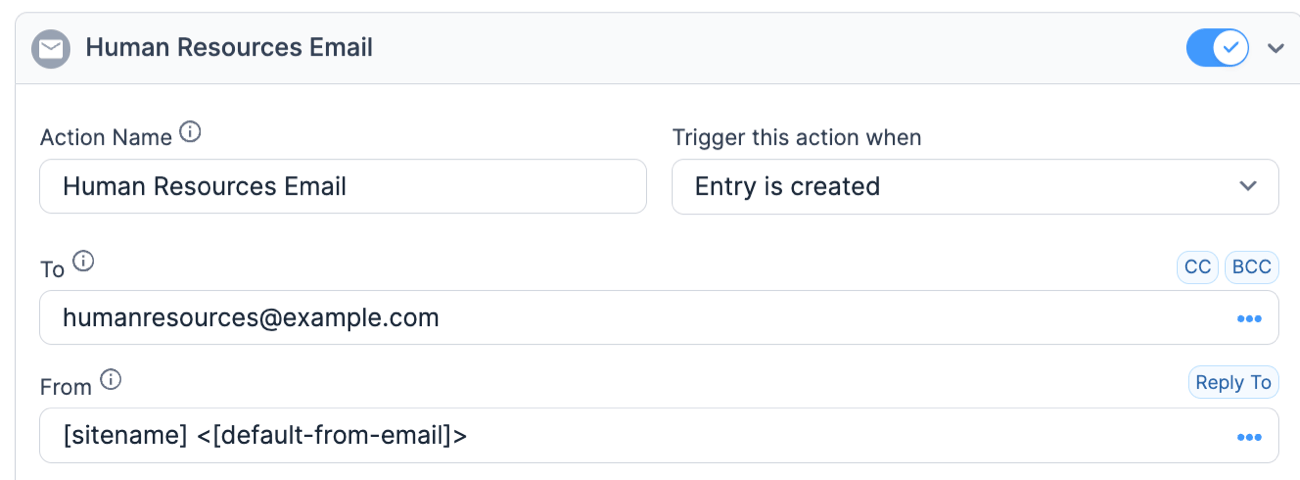
Open the Trigger this action when dropdown and choose Entry is created. By default, Formidable Forms will send the notifications to the address set for the site administrator in your WordPress settings. Still, you can change this email address if required.
You may also want to customize the message included in your email notifications. When you're happy with your entered information, save your changes.
Step 4: Publish your request a call back form
It's now time to add this form to your website. Navigate to the page or post where you want to feature this form and add a new Formidable Forms block:
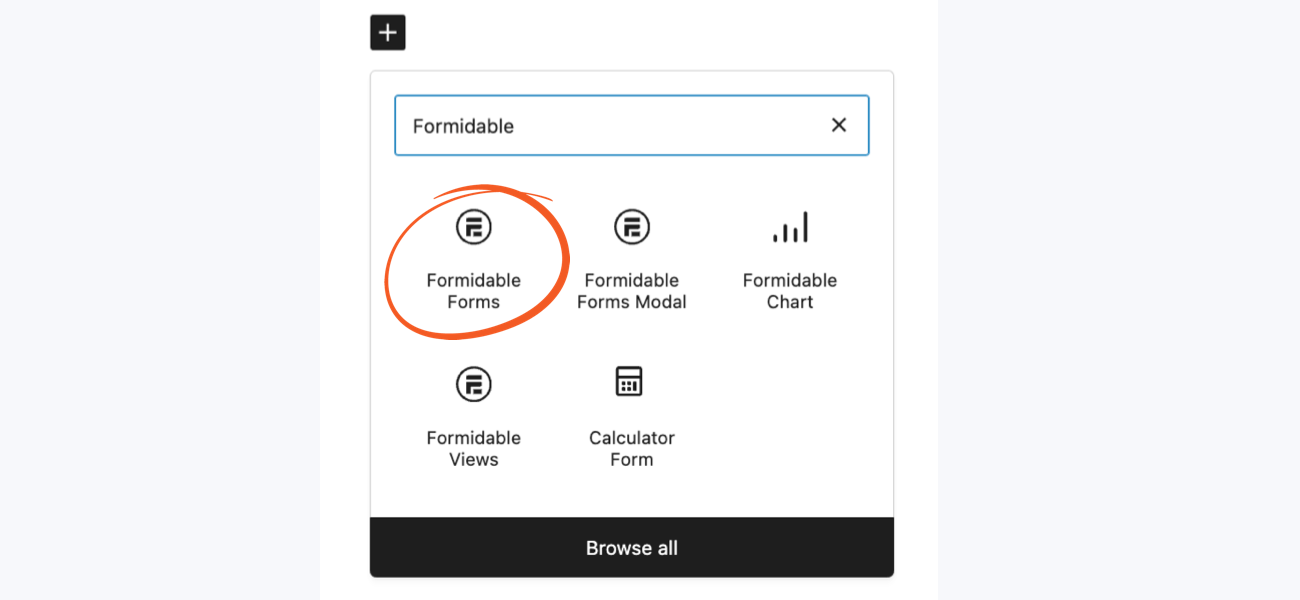
You can now select your new form in this block and update or publish your web page as usual. Now, visitors will be able to request a call back directly from your WordPress website with the request a call back button.
Formidable Forms will send you an email notification every time someone completes this form. You can also view your form submissions at any time by navigating to Formidable → Entries:

Simply hover over the call back request you want to examine, and click on View. Doing this will open a screen containing all the information from the lead.
Conclusion
Phone calls are golden opportunities to convert visitors into customers. However, cold calling often feels intrusive and rarely delivers the best results. By letting users schedule their phone calls, you can reduce the pressure and increase conversions.
With that in mind, let's quickly recap how you can create a request call back form:
- Select Formidable request a call back template.
- Customize the date and time picker.
- Set up email notifications.
- Publish your request a call back form.
You can start capturing quality leads by adding a request a call back form to your WordPress blog or business site. Check out which other forms you can create with the best WordPress form maker plugin!
 How to Make a Pay Per Lead Affiliate Program in WordPress
 How to Generate Leads with a Calculator Lead Magnet
 9 Wild Stats from Lead Generation Form Examples