Learn how to customize a form in WordPress step-by-step. This guide covers all the basics of form customization so you can create forms to fit your needs.
Approximate read time: 5 minutes
Building a form in WordPress is simple.
But making it look exactly the way you want? That’s where things can get tricky.
Whether changing the layout, tweaking the design, or adding custom fields, customizing forms can feel like a challenge if you're unsure where to start. But don't worry, it’s easier than you think! This tutorial will walk you through how to quickly and easily customize a form in WordPress to suit your specific needs.
Best of all, no coding is required. One simple plugin allows you to create and customize a form in WordPress.
So, let's get started.
Why worry about form customization in WordPress?
Form customization may seem like it's just about making forms look good.
But it's also about creating a better experience for you and website visitors. A well-designed form can boost engagement, simplify data collection, and improve a brand's image.
Here's how:
- Better user experience: A clean, simple form makes it easier for people to fill out. And when the average form conversion rate is only 1.7%, the little things matter.
- Improved accessibility: Custom styling helps ensure the form is easy to read and use on all devices, especially on mobile.
- Brand consistency: Consistency matters, especially with a brand's image. Matching your website's look and feel gives you more credibility.
So, taking the time to customize your forms makes things easier for website visitors and makes your business more effective.
How to customize a form in WordPress
Customizing a form is easy with the right plugin. And if you're building forms in WordPress, then Formidable Forms is the best WordPress form builder for the job.
In four easy steps, you can have any form on a WordPress website fully customized to match the theme:
Step 1: Install and activate Formidable Forms
You can use Formidable Forms Lite or Formidable Forms Pro to customize the forms on your WordPress site.

With Formidable Forms Pro, you get pre-built WordPress form templates to save yourself even more time (along with other excellent form features). The initial setup will be similar to whichever option you choose.
First, go to your WordPress dashboard and go to Plugins → Add New. Next, search for "Formidable" and click the Install button. After it installs, click the Activate button.
If you're using the Lite version, you can skip to step two and create a form!
If you're using Formidable Forms Pro, there are a few more steps to set things up.
Go to Formidable → Global Settings in the WordPress dashboard and click the Connect an Account button. This will load the Formidable Forms website, and you can follow the setup wizard to connect your Pro account.
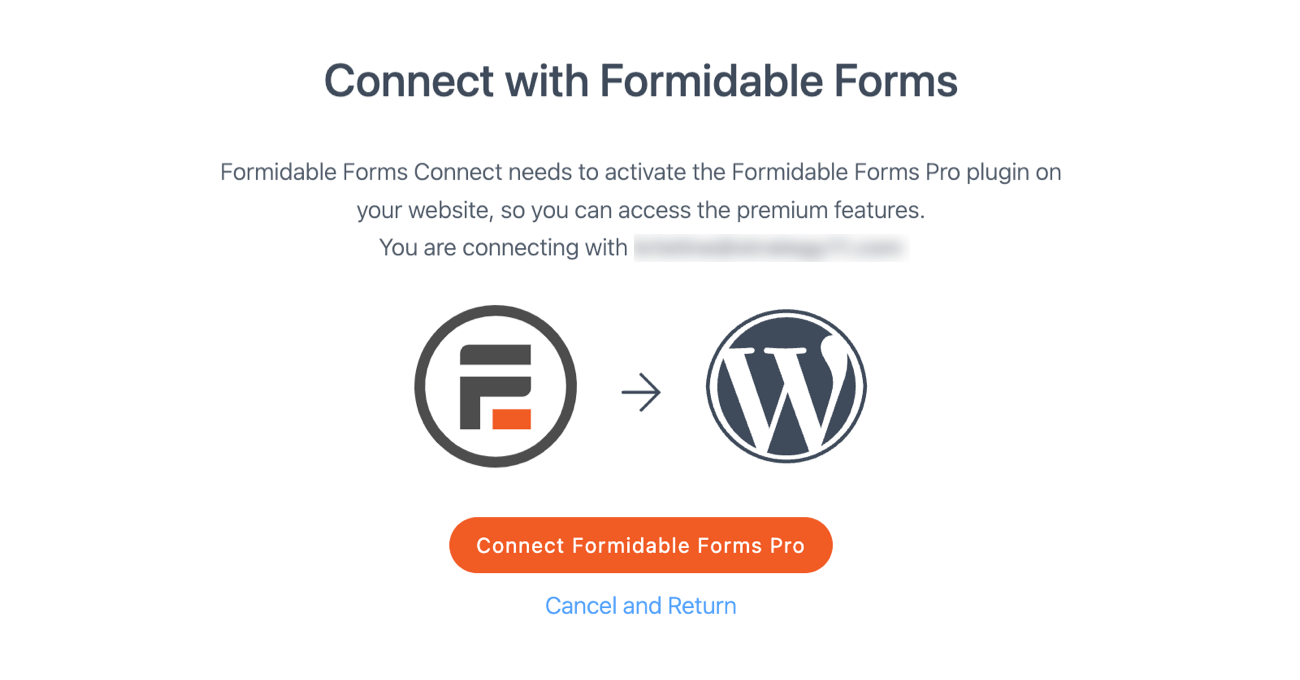
If you have issues, you can install manually to bypass the setup wizard. For any other issues, check out our installation docs.
Step 2: Create a form
Now it's time to create the form you'll customize. You can edit a contact form, order form, or even a survey if needed.
First, go to Formidable → Forms and click the Add New button.
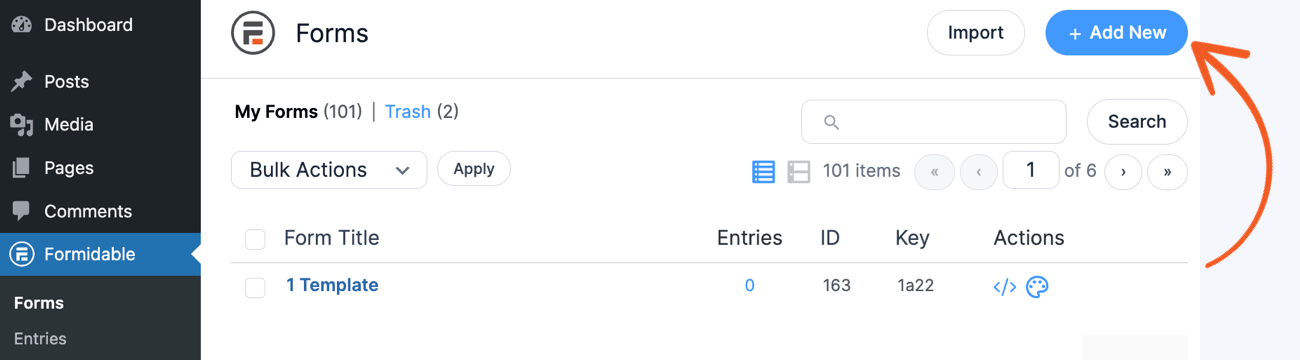
Next, you have a few options:
- Create forms from scratch
- Create a form using a pre-built WordPress form template
- Use Formidable's AI form builder
The last two options are available with a Formidable Forms Pro plan. Otherwise, click the Create a blank form button to open Formidable's drag and drop form builder.
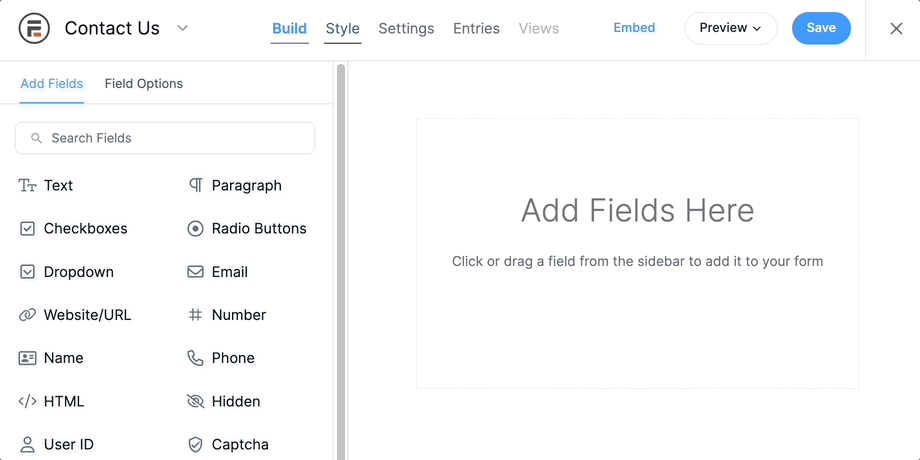
Feel free to add any form elements you need based on the type of form — Name, Email, or even Radio Buttons. You can click them to add them or drag and drop them. Then, customize the labels and other form settings on the left-hand side.
Once finished, click the Save button at the top right and name the form. Now, it's time for some form customization.
Step 3: Customize the form
Next, go to the Style tab at the top of the form editor.

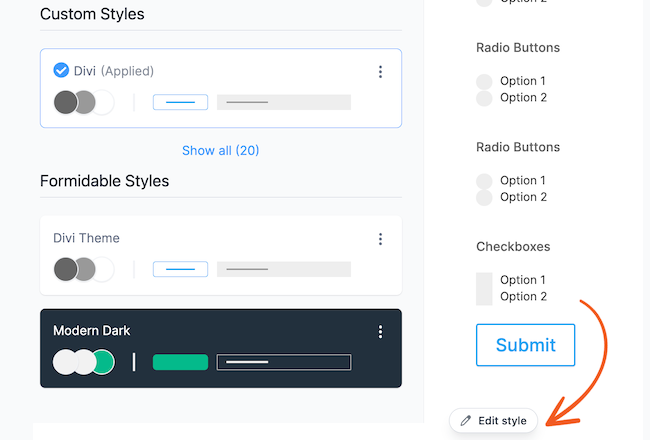
This will take you to Formidable's form styler, where you can customize the form exactly how you want...all with no code!
The form styler menu has pre-made style templates. You can choose any of these, then click the Edit style button to customize it.
In this panel, you can begin customizing the form more in-depth. You can change the primary color, adjust the font color, change the padding, and even change the shape of the form field types.
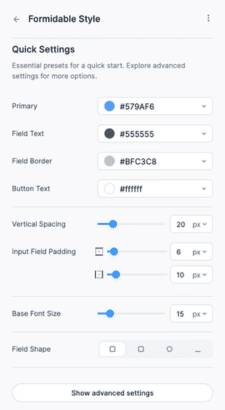
These are the most common settings, so it's super easy to customize the most important parts of the form. But if you want to dive deeper, click the Show advanced settings button at the bottom.
This will open up the settings so you can customize every bit of your form...literally.
Want the field labels a certain color? Just change the setting under Field Labels. Need to adjust the padding on a button? The Buttons settings make it easy.
If you want to customize a part of your form, there's a setting for it. This makes it easy to match your theme, website, or brand without a bit of custom CSS.

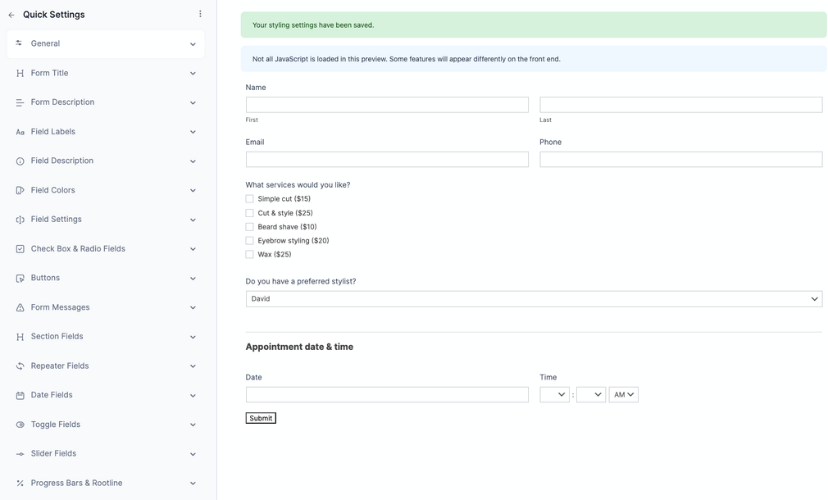
Feel free to play around with these settings and customize the form exactly how you want. And, when finished, click the Update button to save any changes you've made.
Then, it's time to publish your beautiful form for everyone to see!
Step 4: Publish the form
Last, head to the post or page where you want to show your form.
Next, add a WordPress block and search for the Formidable Forms block. When it appears, choose your form from the dropdown.
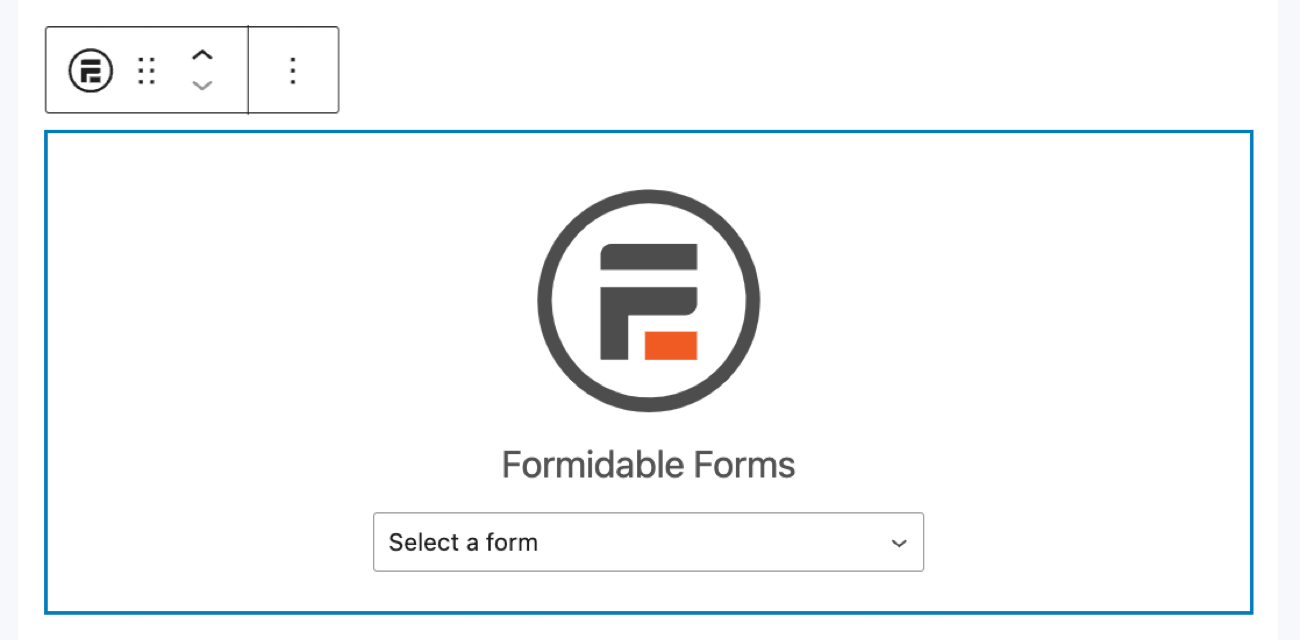
The form will then automatically display. All that's left is to update the page or post so it's live, and then everyone can see the form.
Form customization made easy
Customizing a form in WordPress doesn't have to be difficult. With the right plugin, you can easily change your forms' layout, design, and style without touching a bit of code. And Formidable Forms is that plugin.
So, if you're ready to get started, grab Formidable Forms using the button below!
Also, join our community on Facebook, Twitter, and YouTube for more WordPress form customization tips and tricks!
The post How To Customize a Form in WordPress [The Easy Way!] appeared first on Formidable Forms.