Quantcast
Channel: WordPress Tutorials Archives - Formidable Forms
Viewing all 521 articles
Browse latest View live

How to style WordPress form submissions for print

$
0
0

Need to print form submissions? Does your View look great on screen, but not on a printed page? This tutorial shows how to format a View to print form data.


How to style WordPress form submissions for print

Why print form submissions?

Since the rise of mobile devices, my office printer gets less and less use every year. I carry documents on my phone and display them on the screen. Even barcodes on plane tickets are scanned directly on the screen without the need to print. I can't even remember the last time I bought ink for my printer. But I could never throw out my printer completely, since there are some things too important to not have a hard copy. It will always be a vital part of my home office!

Print form submissions in WordPressWords on paper often have a greater impact than the same words on screen. Coupled with the occasional reliability issues of electronic devices, the ability to print data is essential. Even simple things like a dead battery can remind you of the value of a hard copy!

Maybe you've built a WordPress job board and want to allow applicants to print job details. Regardless of what you need printed, this guide will show you how to make your submitted form data printable.

Option 1 - Print WordPress pages with CSS

So you've built a custom reports View that looks amazing on-screen. Now you want to print it. If you're looking to style your View for the printed page, you will need some CSS. This styling will hide some of the elements that look good on-screen, but not on paper. Your custom print CSS can be added in your child theme CSS, or on the Formidable > Styles > Custom CSS.

This first option is quick and easy to implement. Styles apply globally so this method is not as flexible as creating a custom View specifically for printing.

This code will only affect the output when printing (or bring up print preview). It simply hides some elements that commonly look messy when printed, resulting in a cleaner print version.  For any element you'd like to hide, add the class "dont-print".

Please note that this CSS is just a starting point. Depending on your theme and styling, you may need additional CSS for your site.

@media print {
.dont-print, header, nav, aside, footer, #header, #sidebar, #footer, #colophon {
display: none !important;
}
article, #content {
margin: 0;
float: none;
width: auto;
}
* {
background: none !important;
box-shadow: none !important;
}
}

Option 2 - Create a View to print form submissions

Sometimes the "one size fits all" solution isn't ideal. If you want to apply different print styles to different Views, you will need to approach this another way.

For example, you may want custom styling to apply only to a single View. Or you may find that the data you display on the screen simply will not fit on a printed page. In this case, the solution may be to duplicate the existing "on-screen" Views, and modify the duplicate to optimize for printing.

Step one - Create a View

First, create a View that displays the data you want to print. You may wish to remove info that isn't vital and rearrange the layout a little. Test to ensure that your data will fit within the limits of the paper size.

Step two - Add print CSS

The next step is to build your custom CSS. Print CSS differs from screen CSS in one main way: it's aimed at a fixed document size. When designing for the web, we're always working hard to have responsive layouts that look great on all screen sizes. But with print CSS, you can (and should) define a fixed page size.

There are options to define page margins, page orientation, and even automatically insert page breaks and page numbers. This guide is a great introduction to print CSS. I'd definitely recommend reading before you go any further. Instead of adding CSS to the Formidable -> Styles page, add it directly to the View content box, wrapped in style tags.

Step 3 - Create a print button

The final step is to create a print button. Because this isn't a special Formidable function, and is widely used online, I'm going to link to offsite articles that explain this in more detail than I could in a single blog post. The Javascript window.print function is perfect for building a "Print this screen" type button. CSS Tricks also discuss how to implement a print button and include some additional information.

Do you print form submissions on your WordPress site?

If you print form submissions and you have any additional tips and tricks, we'd love to hear about them! Why not post in the Tips & Tricks section of our community forum?

Not using Formidable Forms for your WordPress forms? Learn more about the features of the best online form builder plugin or try out our free WordPress form builder.

The post How to style WordPress form submissions for print appeared first on Formidable Forms.


How to collect electronic signatures in online forms

$
0
0

New laws about electronic signatures allow many legal and banking forms to be completed online. Learn how to use signature fields in online forms to take advantage of the possibilities.


Electronic signature on your online forms
Electronic signatures aren't new, courier services embraced them almost without exception over the last ten years. In most countries these online signatures are legal and binding. As a result, electronic signatures may even be used as evidence in court in some countries.

This has opened up a whole new realm of uses for online forms. Now legal documents, lease agreement forms, loan applications and much more are easily completed online! If your form needs to be legally binding, asking for an electronic signature is a must.

Sadly there isn't yet a global standard for electronic signatures that will hold up in court. For that reason, if your form needs to be binding, it is vital to check the laws in your country.

The Formidable Digital Signature add-on

electronic signatures in Formidable forms

The Digital Signature plugin allows two ways to collect user signatures. Your users may draw their signature with a touch screen, track pad or mouse, but they also have the option to type it. The drawn option is almost certainly the preferred route, but the "Type it" option makes sure this field can be used be all your website visitors, even those with limited mobility.

Add electronic signatures to existing WordPress forms

Adding a signature field to your old forms is easy and only takes a moment. The first step is to download the Digital Signature plugin and activate it on your site. Don't forget to add your license key on the 'Formidable' → 'Plugin Licenses' page inside your WordPress dashboard.

Once the Digital Signature plugin is installed, a new field type will appear on the Form Builder page.

To add a signature field to your form, go to edit your form. Find the Signature field in the right sidebar and click or drag and drop it into the form. The signature is usually placed at the end of a form, but you can include it wherever it looks best. Finally, save the form and click 'Preview'. Now the Signature field will appear and is ready for use.

If you want to set custom text for the 'Draw It', 'Type It' or 'Clear' labels, you can do this within the field settings.

electronic signatures field options

Display electronic signatures in emails and confirmation messages

An image file is created when the submit button is clicked, and this image can be inserted in a form confirmation message, email notification, or in a View.

The simplest way to display a signature is to insert [x] in the email message or View where you want the image to be displayed. Make sure to swap out x for the ID or key of your signature field. This will embed the image into your message.

You can also show the image URL alone if you wish, without the image HTML tag. To do this simply use the shortcode [x use_html=0].

Are you collecting electronic signatures in your forms?

If you are, we'd love to see examples of this feature in action. Why not submit your creation to our community showcase and provide inspiration to others building their forms?

Not using Formidable Forms yet? Learn more about the features that make Formidable Forms the best online form builder plugin.

The post How to collect electronic signatures in online forms appeared first on Formidable Forms.

Looking for an advanced WordPress questionnaire plugin?

$
0
0

Need an advanced WordPress questionnaire plugin that graphs submissions, displays statistics, and conditionally displays questions?


The best WordPress questionnaire plugin

More than your average WordPress questionnaire plugin

If you're building an online questionnaire, you've probably seen a few basic plugins built for this purpose. But do you need features that can take your online questionnaire or survey to the next level?

With a few simple tricks, you can increase the number of responses in your survey. Tailor your questions to your users, and customize the thank-you page at the end of your form depending on the choices made in the quiz.

Show a progress bar or root-line

One of my personal pet peeves is questionnaires that seem to go on forever. These usually have no indication of light at the end of the tunnel! I recently started an online survey for my bank and gave up on page sixteen! There may have only been seventeen pages, but I couldn't tell without a progress bar, and ran out of patience.

Increasing form response rates is simple. Let your users know the end is in sight, and your response rate will improve even on long forms.

WordPress questionnaire plugin progress bar

Display only the questions you need

The shorter your form, the more responses you will get. While a questionnaire may not be short, use clever options to prevent it from being unnecessarily long. Since not every question applies to every user, define your user groups early in the form, then use conditional logic to hide questions that do not apply.

For example if your survey is about a recent hotel stay, you may have questions about the hotel childcare facilities and kids activities. But what if the guest doesn't have children? A simple radio button at the start of the form can help. Ask if the stay was for business, a couple's vacation or a family getaway. Then set conditional logic on the questions related to kids activities so they only display when "Family getaway" is selected.

Skip pages with conditional logic

Sometimes you need to hide more than just one or two questions. This is where multi-page forms and skipping entire pages is useful. Group all the questions on specific pages, and use conditional branching to skip pages. As a result, your form will seem shorter, and more users will complete it.

conditionally skip pages in a WordPress questionnaire plugin

Customize the results page

Show different content on the thank you page depending on choices made in the survey. If you score your questionnaire, use conditional statements to display customized content based on the score.

Beyond the questionnaire

Questionnaires are all about collecting useful data. But what you do with that data is equally important. Displaying your data in an easy-to-read and eye-catching way is vital.

Statistics allow you to count the number of entries, show a total or average for numeric entries. Or display the maximum or minimum amounts entered. Customize the stats based on dates, the user viewing them, by maximum or minimum value, or even by a specific value. This allows you to easily generate different statistics for each user segment.

Graphing survey results can be done in much the same way. Choose a graph type that best fits the data, including line graphs, bar and column graphs, pie charts, and scatter graphs. Custom colors can really make your graphs stand out.

graph results from your WordPress questionnaire plugin

Scoring quizzes just got easier!

Have you seen our brand new Quiz Maker plugin? This lets you setup a grading scale, display the score as a fraction or percentage, and more.

Have you built an amazing questionnaire on your WordPress site?

If you have already mastered the perfect questionnaire or survey and you have any additional tips and tricks, we'd love to hear about them!

Not using Formidable Forms for your WordPress forms and surveys? Learn more about the features of the most advanced form builder plugin or try our free WordPress form builder.

The post Looking for an advanced WordPress questionnaire plugin? appeared first on Formidable Forms.

Insert Adverts Between Posts in Formidable Views

$
0
0

Does your website use advertising? Did you know you can insert adverts between posts? This tutorial will show you just how to do that.


How to insert WordPress ads in Formidable Views

If your website leverages WordPress ads, the announcement about a new shortcode for incremental content in version 3.0 will have caught your attention. This tutorial will show you how to maximize this shortcode, and insert ads between posts in Formidable Views, both incrementally and recurring.

This feature was born from user requests wanting to know how to add custom ads within the content.

Some users wanted an advert after three entries, and maybe another after the tenth entry. Some wanted to add layout elements after specific entries to build a custom page grid or design. Or others wanted the first entry to show different content or different styling.

Do you have a business directory and want to show a banner ad after every 5th business listing? With this feature, you can do just that. Read on to find out how you can insert ads within your post content in WordPress and how to add custom ads in WordPress.

The ability to add incremental content or adverts in Formidable Views has many benefits. We were delighted to announce the [entry_position] shortcode last year. Finally, it’s time to give this feature the fanfare it deserves!

Two ways to use incremental content on your WordPress site

Adverts in Formidable Views real estate

There are two ways that you can insert incremental content in Formidable Views. Here’s how to place the ad code in between the HTML of your content feed.

On its own, the [entry_position] shortcode can be used to place adverts or extra content in specific positions. This is perfect if you want to highlight the first entry with different styling.

Because the [entry_position] shortcode does not automatically repeat, you will need to add a new condition for each section of content you require.

If you have a lot of entries displayed in your View, you may also want this content to recur automatically.

Another new feature is the ability to combine the [entry_position] and [frm_condition] shortcodes. This means you can set your incremental content to automatically recur, saving valuable time!

How to insert an ad one time within the entry loop

The [entry_position] shortcode gives you a simple way to add extra content at specific positions within your View. It is especially useful for Views that display a small number of entries, and where incremental content does not need to automatically repeat.

Use this code at the bottom of your View content to insert an advert after the 3rd entry:

[if entry_position equals=3]Include an ad here[/if entry_position]

The same method also allows you to highlight or feature the first entry in a View. Add classes or inline styling to specific entries to style your View:

[if entry_position equals=1]<div class="featured">This is the first entry. It gets more space.</div>[/if entry_position]
[if entry_position not_equal=1]This is not the first entry.[/if entry_position]

This new shortcode also supports less_than and greater_than conditions. Use these options to feature the first three entries in a View this way:

[if entry_position less_than=4]<div class="featured">This is a featured entry. It gets more space.</div>[/if entry_position]
[if entry_position greater_than=3]This is not a featured entry.[/if entry_position]

Recurring, incremental content made easy

If your View displays a lot of entries, regular incremental content would mean lots of added code. Things can get a bit messy if you use a new [entry_position] shortcode for each content insertion.

Automatically recurring, incremental content is the answer!

Combining the shortcode with [entry_position] allows some interesting possibilities.

To add additional content on every 3rd entry in your View, see the example below. This can be modified to repeat at whatever interval you wish.

 / 3" like=".0"]This is the incremental content

How does it work?

The principle behind this code is that the [entry_position] shortcode will always return a whole number. If you want your incremental content to display every third entry, you simply divide this number by three. This is seen in the “[entry_position] / 3” part of the above code. Feel free to change this number to suit your requirements.

The shortcode checks this returned value against the like=”.0″ parameter. When the entry returns a figure matching this parameter, (any whole number), the additional content will be inserted.

Because of the decimal=1 parameter, the first and second entries will return values with a number after the decimal point that do not match the condition. The third entry will return a value of 1.0 which is a match for the like=”.0″ condition. The value will match for every whole number – in this case that will happen every third entry.


How can ads in Formidable Views power your WordPress site?

Insert adverts between posts in your existing Views with ease! There’s no need to redesign or rebuild your Views, because this feature can be dropped directly into your existing system.

We love to see examples of how you’ve integrated this feature into your website. If you are already using Formidable Forms for WordPress forms, submit your creation to our community showcase and provide inspiration to others building their forms.

Not using Formidable Forms yet? Learn more about the features that make Formidable Forms the best online form builder plugin.

The post Insert Adverts Between Posts in Formidable Views appeared first on Formidable Forms.

How to Create a Salesforce Form in WordPress

$
0
0

Are you looking for a way to link up your WordPress forms with your Salesforce CRM? You can do just that with Formidable Forms. Keep reading to discover how.

How to create a Salesforce form in WordPress

We’ve made it simple to connect Salesforce with your WordPress site. There’s no need to export entries manually. You can link it up to pull them over automatically with our WordPress Salesforce integration.

In this post, we’ll show you just how easy it is to create a Salesforce form in WordPress with the help of Formidable Forms.

The benefits of connecting Salesforce to your WordPress

The main benefit to a WordPress Salesforce integration is that it can save a lot of time. Manually exporting entries is time that can be saved. What’s more, sales processing and customer tracking can be automated through WordPress forms – saving even more time.

With everything automatically loaded into WordPress, this saves any back and forth between your team members over different Salesforce entries. They’ll all be loaded into your WordPress site for them all to see.

How to integrate and create a Salesforce form in WordPress

We have a special Salesforce plugin add-on which we use to integrate the CRM with Formidable.

This allows you to add new contacts and leads into Salesforce, all directly from your WordPress forms.

Salesforce forms setup

All you need to do is map the fields from the contact and lead objects to the fields in your forms. Your lead generation forms will then begin to fill your Salesforce customer lists, and you’ll be able to update as needed.

You can also send data to any custom object within Salesforce. This allows you to save any extra data to Salesforce that you’ve collected in your form, that isn’t standard in Salesforce.

Salesforce forms objects

These act as custom database tables that you can store information unique to your business. Some examples of these include: accounts, announcements, assets, campaigns, cases, groups, contact, contracts, emails, events, ideas, leads, notes, orders products, tasks or goals.

Please note – This plugin requires the Web Services API feature in your Salesforce account. 

We hope this has helped clear up how you can create a Salesforce form in WordPress. Integrations like these don’t need to be difficult because here at Formidable, we know just how frustrating things can be when they’re not made simple.

With our update at the end of last year, we made it even easier to install and update add-ons like this.

If you’re not already using Formidable Forms, take a look at our features to see how we can help boost your WordPress site.

The post How to Create a Salesforce Form in WordPress appeared first on Formidable Forms.

How to Add Multiple File Uploads to Your WordPress Forms

$
0
0

Do you want to give users the ability to upload multiple files to your WordPress contact forms?

create a wordpress form with multiple file uploads

Giving users the ability to upload multiple files in WordPress can make it so much easier to collect the information you need, directly through your forms.

Today, we’re going to be discussing how to create contact forms that allow file uploads.

Why use a file upload field on your WordPress forms?

There are many reasons why you may need to collect information in the form of important documents such as PDFs or images.

Giving users the ability to upload files easily means you are more likely to get the information you need. If users have to come away from the form and send you documents manually, they are much more likely to abandon the form and you'll end up with missing information.

Examples of forms that may need file uploads:

Job application forms – if you're advertising a job role, users can upload resumes or certificates to support their application.

Customer support – customers can attach supporting documents to give you extra information that will help you solve the problem.

User submitted content forms – with a file upload field, you can give users the ability to attach and submit an image or blog post they might want to share with your website. This is great for websites accepting guest blog posts.

With Formidable Forms, all of this is made easy. With our simple drag and drop form builder, you can easily accept images, documents, as well as audio and video files.

Ready to get started? You might want to take a look at our post on what to look for in a WordPress file upload form for some background information.

In the meantime, here is our step by step guide on how to include file uploads on your contact forms.

Step 1 – Create a new form in WordPress

If you haven’t already, you’ll need to install and activate the Formidable Forms Pro plugin.

Once you’ve got our plugin installed, simply click Formidable on the left, and then Add New. Then select the template you’d like to use. For example, you could choose the ‘Contact Us’ template or the 'Job Application Form'.

Formidable will then load up a simple contact form, with extra options on the right hand side, as shown below:create a contact form

For more information on creating a new form, take a look at our documentation for a step by step guide.

Step 2 - Add the File Uploads field

As you can see from the screenshot above, there is a File Upload field that you can easily click to add to your forms. It's really as simple as adding one field, and then another if you wish to accept multiple file uploads in different sections of your form.

See below for a job application form example. This form accepts resume uploads as well as evidence of any certifications.


file upload fields

Step 3 - Customize your file upload fields

The next step is to simply rename each upload field according to what you want to show and add any descriptions to make things clearer for your users too.

Click Field Settings at the bottom of each section to see all the options you can customize for each field.

WordPress File Upload Field options

You can personalize each section by specifying the maximum file size of each upload, the file types accepted and whether this is a required section or not. This means you're less likely to get irrelevant files or large files that may slow your website down.

Read more: Client-side image resizing for faster form submission

File Upload Allow File Types

While it's a simple click-to-add for multiple file uploads in different sections, you can accept multiple uploads in the same section here.

See the screenshot below, where you can simply check the box that says Multiple Files and 'allow multiple files to be uploaded to this field'.

File Upload Multiple Files

Using the same example of job application forms, you might want to accept multiple file uploads if asking for evidence of qualifications. Users can then submit as many certificates or documents to support their answer, all within the same section.

Step 4 - Use conditional logic to improve your forms

Keep your forms clutter-free and show users only what they need to see by using conditional logic. Conditional logic enables you to show or hide fields, depending on what information a user has already submitted.

Conditionally show form fields

For example, if you ask the question "do you have any certificates/qualifications?" in a job application form, the next question can naturally follow on from that. If they answered 'yes', the next section to appear could be a multiple file upload field. If they answered 'no', then there's no need to show this field at all. This keeps the form clear and easy to fill in.

If you're unsure about what conditional logic is and why you could benefit from it, our recent blog post takes you through how to use conditional logic to build smarter forms.


Step 5 - Add your new form to your WordPress site

Once you've created your new form, you'll need to make sure it's visible on your website. Formidable allows you to add forms to your website easily once you've created them.

First, create a new post or a page in WordPress and click on Formidable at the top of your editor. You'll need to click 'Add Form' and then select your newly created form to add it to the page or post.

The next step is to publish your post or page and your contact form should appear on your website, ready for people to fill in. It should appear like the example below:

WordPress file upload field drag and drop

So, there you have it - a simple way to accept multiple file uploads to your website forms. We hope that this introduction to file uploads has helped you realize the potential of your WordPress forms.

With Formidable, we want to make it simple for you to build complex and custom forms with as many fields as you need to use.

With multiple file uploads in WordPress, you are free to create complex forms that collect all the data you need, not just some of it.

If you're not already using Formidable Forms, why not head over to our features page to see the many ways we can help your website get the results you want.


The post How to Add Multiple File Uploads to Your WordPress Forms appeared first on Formidable Forms.

How to Set up Google Analytics with Your Forms (Step by Step)

$
0
0

Wondering how to set up Google Analytics with your forms? This simple step by step guide will help you get set up.

How to set up Google Analytics with your form

Google Analytics is without a doubt one of the best resources out there for business or blog owners who want to access the exact data on their website traffic. There is plenty of awesome information you can track like your bounce rate, page views, and even the demographics of people who come to your site.

But what about your forms?

When you use Formidable Forms to keep in contact with your customers, it can be challenging to keep track of all the data that comes in daily. We have great news. You don’t have to spend hours sifting through your form information to see how people are responding anymore.

There is a much easier way to track all of your form data and it only takes a couple minutes and a few clicks.

Benefits of Tracking Your Form Data

The main benefit of being able to track your form data with Google Analytics is that you’ll have up to date information whenever you need it. You’ll be able to use your analytic data to adjust your marketing and build excellent new forms when the need arises.
Another interesting benefit is you’ll be able to see who is responding to your forms, which can help you pinpoint your target audience. You’ll also be able to look at your conversion rates, which will give you an idea of how well your forms are doing.

One of the challenges of implementing Google Analytics with your forms is that you would have to go to a separate page to check your statistics. Luckily, there is a WordPress plugin that lets you check your forms directly from your WordPress site.  We are going to show you how to install this plugin and how to start tracking your form data today.

Step 1: Install MonsterInsights

If you’re reading this, it’s likely that you already have your Google Analytics set up as well as your Formidable Forms plugin. The issue is that you need to bring these two together. You can start this process by going to the WordPress Plugin page and searching for MonsterInsights.

install monsterinsights

After you’ve installed the plugin, you should go to the MonsterInsights website and create your account. There are multiple options available ranging from the Plus plan for people with one website to the Agency plan which is for 25 plus websites. In order to track your forms, you’ll need either the Pro or Agency version of this plugin.

Step 2: Navigate to Add Ons

You should now go back to your WordPress dashboard. You’ll notice that now there is a new button on your navigation bar on the left side of the screen called Insights.

After locating the Insights button, hover your mouse and a list of new options will appear below. From the list of options, select Add Ons.

MI insights addons

Step 3: Install MonsterInsights Forms

The addons menu will have a list of different features that work with MonsterInsights. You’re going to want to look for one called MonsterInsights forms.

You’ll notice that below the addon, there is a button that says Install. Click on Install and this will add the form tracking feature to your MonsterInsights account.

Monster insights install

Step 4: Activate Form Tracking

After a few seconds, the install button will become a red button that says “Activate.” Click the red button and it will shift to green and you’ll have turned on the form tracking feature.

mi form tracking

That’s all there is to it! You’ve now turned on form tracking on MonsterInsights, which shows you your Google Analytics information. Speaking of which, let’s go ahead and show you how to check your form data.

Step 5: Check Your Form Analytics

Checking your forms is even easier than installing the addon! If you go back under the Insights tab on your WordPress dashboard, you’ll see that the first option says Reports. Click Reports to open up your Google Analytic data.

mi form overview

Great! Now all of your website’s data should be on your screen. But we don’t need all the data right now, just the form data. Look at the top of the screen and you’ll see all of the different types of analytic data you can view. Click on Forms to open your Formidable Forms data.

MI_Form_Tracking

Here is what your form data should look like. You’ll notice that it’s possible to track impressions, conversions, and your actual rate of conversion.

monster insight listings

Conclusion

Tracking your Google Analytics data, especially as it relates to your forms, used to be time-consuming and difficult. Now, as you can, you can set up your Analytics account to your WordPress site and track your form data in just a few clicks.

You can now use the data you receive from your Formidable Forms to enhance the experience of your customer. There’s no doubt that people love feeling like they are part of a group. Being able to change and monitor the actions of your customers can help you build the ultimate customer experience.

The post How to Set up Google Analytics with Your Forms (Step by Step) appeared first on Formidable Forms.

How to Add a MailChimp Signup Checkbox to a Contact Form

$
0
0

Want a quick and easy way to grow your email list? This post takes you through how to include a mailing list signup checkbox on your contact forms.

How to Add a MailChimp Signup Checkbox to Your Contact Form

Growing your email list is one of the simplest and most effective ways to boost your conversion rates. It’s a highly targeted way to promote your business. It also keeps people updated and interested in your brand.

However, building an email list and convincing people to sign up can be hard work. That's why it's important to make it as simple as possible for them to do so.

A quick and easy way to grow your email list is encourage people to sign up while filling out your contact form. Making it almost effortless to sign up can really boost your numbers. So, adding a MailChimp signup checkbox can really help.

In this post, we’ll walk you through the simple steps you need to take to add a MailChimp opt-in checkbox to your forms.

Step 1 - Create a MailChimp Contact Form

The first step is to create a new contact form. Our Contact Form template will save you time and gives you a basic template that you can customize if you wish.

The next step is to link your MailChimp account with Formidable Forms in WordPress so that we can access it. For a step by step guide on how to do this, take a look at our post below.

Read More: How to Make a MailChimp Contact Form for WordPress

Once you've set MailChimp up, it's time to add it to your contact form. To set this up, go into Form Settings > Form Actions > Add to MailChimp.

Mail Chimp Icon

Step 2 - Add a checkbox to your MailChimp signup form

Adding a checkbox is as simple as clicking on the 'Checkbox' field in the fields list on the right. You can rename your checkbox field and include multiple options if you wish.

join our mailing list checkbox

As we're dealing with a mailing list opt-in checkbox, it's best to have just one option renamed to something like 'Join our mailing list?'. As you don't really need a title to this field, put the Label Position to 'None' so it's a bit cleaner.

Once published, you'll end up with something like this:

mailchimp form checkbox

Step 3 - Use Conditional Logic to add users to your mailing list

You'll need conditional logic to work behind the scenes to ensure that only people who check the box are signed up to your mailing list. Conditional logic just means that the next step is triggered, only if specific conditions are met when the user filled in the form. So the next step triggered in this case will be a confirmation message that your email address is added to the mailing list.

You'll need to make use of the MailChimp form action you created in step 1. Go back to Form Actions and click on the 'Add to MailChimp' section.

This will pull up a drop down 'Add to MailChimp' section. Find and click on 'Conditional Logic' and you'll get something like this:

MailChimp Conditional Logic

Change the default settings to the ones shown above and you'll be able to add users to MailChimp, but only if they tick Yes/tick the checkbox.

Step 4 – Test your signup checkbox works

The final step is to check that everything works. Do this by publishing your contact form and fill in some details as a test. Just make sure you use a different email address than the one associated with your MailChimp account, as this won’t send a subscription confirmation.

Now you're all set up with a MailChimp checkbox, the next thing to do is build your email list. The checkbox will certainly help, but you've still got to provide great content and an incentive to stay subscribed. Take a look at our post on how to create an email list for your WordPress blog. This will take you through all you need to know to get your email list up and running. In no time, you'll boost your conversions and increase sales!

See our documentation for further information about using MailChimp with Formidable Forms.

Not yet signed up to Formidable? Take a look through our wide range of intuitive features to find out exactly how we can improve your website's effectiveness.

The post How to Add a MailChimp Signup Checkbox to a Contact Form appeared first on Formidable Forms.


How to Add a Contact Form to a WordPress Sidebar

$
0
0

Do you want to make it easy for users to get in touch with you? Putting a contact form in your sidebar could be just the thing to boost conversions by giving users an easier way to contact you.

How to Add a Contact Form in a WordPress Sidebar Widget

No doubt you're already looking for ways to improve your website and increase conversions. As a business website, the easier and more streamlined you make anything, the more likely you are to see those visitors turn into customers.

That goes for a lot of things on your website, particularly the contact form.

If you rely on website contact forms to drive sales, or even if you just rely on them for customer service, having a handy form in your sidebar can make all the difference.

Website visitors won’t have to scroll up and click on your contact page for more information. They won't have to hunt around for an email address or head over to social media to get in touch. They can simply enter their details on the page they’re already on.

Perhaps you have a great blog post and people want to see more content like that. All they have to do is look to the right and there they'll find your contact or sign up form. They hardly have to even lift a finger. This is such a simple addition that could really boost your signup rates in the long term. When people take the time to contact you, and get a helpful response from you, they're so much more likely to end up becoming your customer. So, an easy way to contact you is in everyone's best interests.

So, how do you add a contact form to a WordPress sidebar? Luckily, it’s really easy to do and yours will be up in no time. You don't need to know any code or specialized knowledge. It can all be set up with just a few clicks.

Step 1 – Create a WordPress contact form

The first step to getting a contact form in your side bar is – you guessed it – to create a brand new contact form. If you've already got a contact form ready and waiting, you can go ahead and skip to step 2.

If you haven't added a new contact form, simply go to your WordPress admin panel and click on Formidable > Forms > Add New. From there you can either build your own from scratch, or use our handy Contact Us form template to save some time.

For more information about how to create a new contact form, you can take a look at our post on it below.

Read More: How to Create Simple Contact Forms in WordPress

Once you’ve got your simple contact form created, you can then customize it however you want. If our template doesn't have all the fields you need, simply add in whichever you want from the list, or even take some away. This will take only a few minutes and then your form will be ready to publish and use however you like.

You can also include this form on your Contact page or elsewhere if people prefer that way of getting in touch instead.

Step 2 – Add a contact form as a WordPress sidebar widget

The next step is to click on Appearance in your Wordpress panel. You’ll then get a list of options including Widgets. Click on that and from there you can manage all your Widgets, both sidebar and footer ones.

You should see a list of all the available widgets you can use. Find Formidable in the list and click on it. This should pull up the option to add either to the sidebar or the footer. Choose sidebar and this will automatically add it to your sidebar list.

add Formidable forms widget to wordpress sidebar

On your right you should see a Blog Sidebar option with a list of all the widgets you have enabled there.

If you click on the Formidable widget, it’ll expand and give you more options. This is where you choose the contact form you wish to use in a dropdown. You can also add a title like ‘Contact us today for more information’.

formidable forms widget

This will add the contact form widget to your sidebar. You can drag and drop what order you put the items in your sidebar, depending on how you want it to look.

Step 3 – Include a mailing list checkbox (optional)

If you’re looking for an easy way to boost your email signup numbers, your contact form is a great place to do this.

You can add a simple newsletter signup checkbox to the bottom of your contact form. This way, when people input their contact details, they’ve got an option to hear more from you in the future.

This makes it effortless for them to signup, where they might not have even thought of it before. This is particularly useful for website visitors who really enjoy your blog posts and want a way to keep up to date with them.

You can find out exactly how to do this by following our handy step by step guide on how to add a simple newsletter signup checkbox.

Step 4 - Publish your contact form

Once you've created your contact form widget and are happy with it, it's time to publish it. In the end you should have a sidebar that looks a little like this (with or without the checkbox at the bottom):

wordpress sidebar widget

It really is as simple as that. All it does is take a few minutes out of your day to set up. It's an easy way to save all your users plenty of time when they want to contact you.

We hope this has helped you do more with your sidebar to increase conversions. This is an non-intrusive, simple way to encourage users to get in contact with you in a way that doesn't harm the user experience in any way.

If you're not already using Formidable Forms, take a look at some of our fantastic features. All of which are designed to propel your website and business forward.

The post How to Add a Contact Form to a WordPress Sidebar appeared first on Formidable Forms.

How to Calculate a 5 Star Ratings Average in WordPress

$
0
0

Are you looking for a way to find out what customers really think? A star rating system is a simple way to get to know your  existing customers and turn potentials into new ones.

How to Calculate 5 Star Rating Averages in WordPress

Do you send out surveys or reviews but receive partially filled in answers? Or just no answers at all. It's a common problem that a lot of businesses have, and yet customer reviews are really important.

Star ratings can improve your conversion rates and help you collect and analyze the data you need. They're such a simple addition to your forms. So, in this post, we'll show you just how to get it set up.

Why have a rating system on your WordPress website?

Better user experience

Star ratings are a simple, one-click function that helps to make things easier for the user. The truth is that many of us don't have the time or the will to write out detailed answers to questions businesses send out to us. Making it as easy as possible for them to answer increases the chance that they will at all.

Get accurate data you can use to improve your business

If you leave a box with a 'please tell us what you think of our product/service', you might get some answers. However, the chances are you're only going to get answers that are from one extreme or the other. People usually only take the time to write a detailed answer if they really loved your product/service, or they hated it. That means those customers in the middle, who were satisfied but are yet to be wowed are going under the radar.

Ideally, you want to bring those in the middle into the 'loved your product/service' category. But you can only do that if you know about them in the first place.

User ratings help you understand your users' individual preferences better and the more you know the better. With more answers from different people, and a different range of opinions, you'll get a much fuller picture of what's really going on. This information can be used to improve your business, your customer service, and will in turn boost your conversions too.

Help users make complex decisions

Who doesn't look at star and user ratings before they make a purchase? It's often the first thing we see when we do research before buying something. Those little additions to product pages or review sites can make or break a business.

In a lot of cases, you can decide to sort product page results by customer rating. People are so used to seeing and using them now that if your website doesn't have them (particularly eCommerce sites), it may mean you're missing out on potential business.

Spiegel Research Center's findings on customer ratings showed that higher star ratings have a direct impact on customer conversion rates. Although, they also said that ratings that look too perfect (nothing but 5-stars) actually had a negative impact on conversion rates because they were deemed unbelievable. That's why it's so important to get accurate results from as many people as possible.

Read More: 10 Good Questions to Ask on Your Customer Satisfaction Survey Form

How do you add a star rating system in WordPress?

So, your next question may be: how do you add star ratings to your WordPress website? You may be looking for a special star rating plugin for WordPress. But you can do it all within Formidable Forms. We'll take you through how to do it below.

1. Create a star rating field on your form

The first thing you need to do is set up a field for star ratings. Create a new form, or open the one you want to add a star rating to.

You should see a list of form fields on the right hand of your screen. Below you can see the Star Rating option in the bottom right hand corner. All you need to do is click on it. This will automatically add the field to your form.

add star rating in wordpress

2. Customize your star rating field

Next, you'll need to customize it. Expand the form field shown above and this will show you more options to customize the field.

You can determine how many stars you would like to display by changing the 'Maximum Rating' to whatever number you would prefer. The default is set at five because that's what most people use, but it's totally up to you.

You can also set the field as required* if you know you definitely want the rating when you ask for feedback from your customers.

customize star rating field

Once you're happy with your changes, it's time to publish the form and see what it looks like on the front-end. It should look something like this, with the 'Scale' part being whatever you wish to call the field.

Star Rating Stars Displayed

3. Display your WordPress star ratings

Now you know how to include and accept star ratings on your forms, what next? What do you do with this information? Having the information for yourself is one thing, but displaying that information goes one step further.

You can choose to display ratings for different products or services to help potential customers make an informed purchase decision.

If you wish to display your star rating on a particular page, for example a product page, follow the steps below.

Display an average star rating

To add an average star rating to your page, post, View or widget, you will need to add the following shortcode. This will display an average of all the submitted ratings and will be rounded to the nearest 1/2 star.

You must include a valid field id or key in your stats shortcode.

You will need to replace the X with the ID or key of the star rating field you wish to use.

If you want to display this in a Formidable View, be sure to include the 'filter=limited' in your shortcode. If you do not include this part, the 'frm-stats' shortcode will show on that page instead of being replace with the star rating you want to display.

Display a single star rating

With this shortcode, you'll be able to display a single rating in a View.

[x html=1]

Again, replace the X with the ID or key of the star rating field you wish to use.

That's it, once you've done these simple steps you'll be good to go. We hope this has helped and that including star ratings on your website brings you positive results.

If you want further customization, for example on how the star rating appear in size, take a look at our Docs on star ratings to learn more.

If you're not already using Formidable Forms, and would like to learn about more features like this, take a look at our feature page or list of add-ons. We can help you create the forms you need with our easy drag and drop form builder functionality. 


The post How to Calculate a 5 Star Ratings Average in WordPress appeared first on Formidable Forms.

How to Add a Google Map to WordPress Forms

$
0
0

Are you looking for a way to improve your contact forms by using Google maps? There's no need to embed the map into your page when you can build it directly into the form itself.

How To Add a Google Map To WordPress Forms

There are many reasons why you might need to add Google Maps to WordPress forms. We get a lot of users who need to show their potential customers where they're based and having this information clearly displayed is really important.

The contact form is the perfect place to put location details and what better way to show where you are based than to have a Google Map embedded in your contact form?

This is a great, eye-catching way to display vital information about your business. Everyone knows and recognizes Google Maps instantly. It gives your website and contact page a clean and professional look that potential customers will trust.

If you want to embed a Google Map in your contact form, it's a lot easier than it sounds. You don't need a special Google Maps plugin or coding experience. In this post, we'll take you through the step by step process to get it all set up and functioning correctly.

Soon you'll have a professional contact form that tells people exactly what to expect and where to find you instantly.

Step 1 - Create a form to embed your Google Map in

The very first step is to create a new contact form to hold your Google Map in. You can either do this from scratch, or use our handy Contact Us form template to give you a head start.

Alternatively, you can just use a contact form you've been already built and add in the Google Map to your WordPress site now.

Step 2 - Get your Google Map code

To link Google Maps and pull over your location to display on your website, you'll need to get a special code from Google.

You can easily do this by opening up Google Maps and searching for your business.

Once you've found your business and the location is correct, click on it and select 'Share'. This will bring a little modal popup with a few options including the option to 'Embed map'. Click on that and you'll be given several map size options to choose from. Select whichever one you prefer, that will suit your website best.

adding google maps


Copy the embed code which will look something like:

embedded google map

Step 3 - Add your Google map to your WordPress contact form

Now that you've got your Google map code, the next thing to do is go back to your contact form. In your form fields area, find a HTML field and add that to your form wherever you want.

Expand the form field settings and find a Content box. This is where you'll need to paste your Google Maps code.

google maps embed code

You may need to adjust the width of the map, which you can do by including style="width:100%;" and adjusting the percentage how ever you want.

Once you're happy, simply save your changes and you're ready to publish it.

Step 4 - Publish your embedded Google Map form

The first thing you should do with your new form is go to your Contact page and publish it there.

Your Contact page is the main source of information for website users so it's important that it's your first step before you publish it anywhere else.

Simply click to add a Formidable Form to your Contact page and select the form you wish to use. This will pull up your brand new form, ready for you to publish and share with your audience. It should look something like this:

wordpress google map

Step 5 - Display your contact form in a sidebar (optional)

If you wish to do more with your contact form, you can easily add your form to your WordPress sidebar. You can do the same thing with your website footer if you wish to show your form and map there too.

Adding your contact form in different places like this can really boost your conversion rates. People won't have to scroll up and visit your Contact page, they can sign up wherever they are if all the information they need is right there. Adding in a map can draw the eye and lets users know where you are based straight away.

We hope this has helped you save time when embedding maps on your website. We'd love to know how you get on with yours.

If you're not already a Formidable Forms user, we have plenty more features like this that will help you save time and boost conversions.

The post How to Add a Google Map to WordPress Forms appeared first on Formidable Forms.

How to Offer File Downloads After Contact Form Submissions in WordPress

$
0
0

Do you want to increase signups and boost conversions? Giving users a download file after form submission is the way forward. But how do you set it up so only those who sign up can download files?

How to Offer File Downloads After Contact Form Submissions In WordPress

If you produce high value content that you want to drive sales, a great way to do this is by turning it into gated content. This is the practise of only granting access to content if a user submits their contact information. You can then use these contact details to boost conversion rates through direct content marketing.

The most popular one that you've no doubt seen on dozens of websites is through a contact or signup form. You'll see something like 'Grab our free marketing ebook when you sign up'. This typically enables users to download a PDF after submitting a form. A common place to find these is in the sidebar or footer, where they're very visible but not as disruptive as a popup. Read our recent post on how to include a contact form in your sidebar if you want to boost conversions.

Information exchange is a win-win scenario. You get valuable email addresses to grow your list and your target customers get value for free.

If you're finding it difficult to encourage people to sign up to your email list, gated content could very well be the way forward for your email marketing strategy. It helps you stand out and also provide value to your potential customers, even before they've bought anything from you. What's not to love about it?

Just think of the contacts and conversions you could be missing out on by not using this marketing strategy!

Read More: How to Create a Winning Email Strategy for your WordPress Blog

If you're now wondering whether offering file downloads on your WordPress website is difficult, don't worry it's not. In today's post we’ll be showing you just how to offer a protected file download when users submit a contact form or signup form.

Step 1 – Create a form that can protect files

The very first step in creating a form that supports file downloads is to create a brand new form. As you'll be using this for protected files (gated content), call this form 'Protected Files' to make it easier.

Now you'll need to populate your form with some fields. First add a Text field, this will be a single line field and for this we should call it 'File Name'.

Once that's added and renamed, expand the options of the field and make sure you check the boxes 'Required' and 'Unique'. You can see what it looks like in the image below.

Protect File Upload - Single Line Text

The next field you should add to the form is a File Upload field. This is how it should look below:

Protect File Upload - File Upload

Now it's time to save the form, so click ‘Create’. When the new form settings load, you should find a list of check boxes once you scroll down. Check the box that says ‘Protect all files uploaded in this form’. To save this change, simply click ‘Update’.

Protect File Upload - download file on submit Form

Step 2 – Display files with a View

In order to allow people signing up to see these files, you'll need to display them. You can do this by creating a new View. This is just like when you create a brand new form, except you click on View instead of Forms.

Call your new View ‘Display Protected File’. In the View Format, select Single Entry.

Now's the time for some simple code.

In the content box you’ll need to enter some HTML, as shown below:

 <a href="[x]">Open [y]</a>

Just make sure you replace [x] with the Field ID of your file upload field and [y] with the Field ID of the File Name in order for it to work. Once you've done that, scroll down and find an option for 'Filter Entries' in the Advanced Settings section.

Add a filter and change the options to: File Name equal to [get param=filename default=0]

Protect File Upload - View Advanced Settings

Save your changes before moving onto the next step.

Step 3 – Display the download file after submission.

When your users have submitted a form, the next step is to show them the file they can download. This puts all the steps above into action.

To do this, go to your existing form or create a new one. Then go to Form Settings.

Simply set the form to 'Show a Message' on submit. This will be a success message, telling the user they've successfully signed up. In this message is where you'll display the View where users will be able to download the file.

The View shortcode should look like this:

There are no views with that ID

In this code, the 123 stands for the ID of your View and the Test File means the File Name when you submitted the form originally.

The final step is to update your form, save all your changes and then publish.

Now you should have a fully functioning form that gives new subscribers or contacts access to files you want them to have. Let us know how you get on with your file download form!

If you're not already using Formidable Forms, we have plenty of great features to help your websites boost conversions. We offer simple solutions to complex problems. 

The post How to Offer File Downloads After Contact Form Submissions in WordPress appeared first on Formidable Forms.

How to Use WordPress Forms with Google Sheets

$
0
0

Are you looking for a way to share form entries with Google Sheets? With Formidable Forms, we offer a simple integration to help you back up important data and transfer it to a Google spreadsheet.

How to Use WordPress Forms with Google Sheets

There are a few common reasons why businesses need to export form entries to a spreadsheet. The most common one is to simply back-up your data, something that we'd recommend all businesses do regularly!

Besides backing up data, you might also want to use form entries for other purposes. Having them in a handy spreadsheet means you could do more with them. For example, if you create a online registration form, you could collect contact details in a spreadsheet to make it easier to schedule follow-up calls in the future.

The problem is that transferring all the information you need from one app to the other can be incredibly time-consuming. It's also prone to human error (no matter how careful you are) and this could spell disaster if there are missing entries or typos messing everything up.

Surely there's an easier way of transferring the information you need between two apps?

This calls for the number one modern solution: automation. The beauty of automation is that it removes the time, hassle and errors caused by manually handling data. Why spend all that time manually backing everything up when it can all be handled automatically?

In today's post, we'll be taking you through how to set up a WordPress forms and Google Sheets integration. But first, let us introduce you to the brilliant app we'll be using throughout:

Zapier: A simple way to use your favorite apps together

Zapier is a program that allows you to connect up all your favorite apps and automate your workflows. Their website claims that Zapier is "Easy automation for busy people." Who couldn't use an app like that?

They have more than 1,000 apps available to connect with each other including Trello, Gmail, Asana, social media pages and of course, Google Sheets.

zapier integrations with formidable

How does it work?

When we connect our plugin to Google Sheets through Zapier, Zapier will automatically create a new row or field in Google Sheets whenever a new entry is received in Formidable. This saves you from having to go into Google Sheets and manually add in a new row or field. Zapier works behind the scenes to cut out the middle man.

For this integration to work, you'll need:

  • A Formidable Forms license
  • A Google account
  • A Zapier account to tie it all together

Step 1 - Set up Zapier and connect with Formidable Forms

First of all, make sure you've got an account with Zapier or set one up if you haven't. Next, you'll need to install our WordPress Zapier addon which you can find by going through your WordPress admin panel and clicking on Formidable > Add-ons > Zapier. Install and activate Zapier as shown below.

install zapier addon

Once Zapier is installed, you'll need to connect the two apps through an API Key. Find your API Key through Formidable > Global Settings > API tab. Head over to Zapier and copy over your API Key and your site URL.

Step 2 - Create a Zap for your WordPress site

All the integrations that Zapier handles are called Zaps. So, for this to work, we'll need to create a Zap that connects Formidable Forms with the app you want to integrate with - in this case Google Sheets.

When you log into Zapier, you should see a button at the top of the page that says 'Make a Zap!' Click on this.

create a zap

Step 3 - Select Formidable Forms as your Trigger App

To connect Formidable Forms entries with Google Sheets, you'll need to set a Trigger and an Action. In this case, the Trigger will be Formidable Forms and the Action will be Google Sheets.

This is how the sequence works:

New Form Submission > Creates new form entry > Creates new row in Google Sheets

To choose your Trigger App, go to Zapier's dashboard and search for Formidable Forms. Once this is selected, you'll get a list of possible 'triggers' including 'New Entry' and 'Delete Entry'. Select which one you wish to set up.

select trigger app

Step 4 - Select Google Sheets as your Action App

Once you've set your Trigger App, it's time to tell it what to do. Set up your Action App in the same way outlined above.

Once this has been selected you'll again be given a list of options. These will include 'Create Spreadsheet Row', 'Update Spreadsheet Row', 'Delete Spreadsheet Row'. Choose whichever option you need to be triggered by the option selected previously.

select action app

Step 5 - Choose your Google account and spreadsheet

When you've selected your Trigger and Action apps, you'll now need to tell Zapier what Google account you wish to use.

Then you'll need to select the spreadsheet you want to link with Formidable Forms, so that it knows where to direct the new data.

Step 6 - Map your form fields

Next it's time to map your form fields to specific fields in the spreadsheet. For example, with contact form sign ups, you'll want to match 'First Name' to the 'First Name' column on your Google spreadsheet. You can do this in Zapier once your Google account and spreadsheet has been selected.

We hope this has helped! This is such a simple integration that can save you tons of valuable time and effort. Once little things like this have been automated, you can get back to doing something more worth your time, like growing your business in new ways.

For more information on our Zapier add-on and how to troubleshoot any problems, feel free to take a look at our documentation. 

The post How to Use WordPress Forms with Google Sheets appeared first on Formidable Forms.

How to Send SMS Text Messages from Your WordPress Forms

$
0
0

Are you looking for a way to reach your new customers via SMS? Linking up your WordPress website forms to SMS messages can help build the client relationship further.

How to Send SMS Text Messages from Your WordPress Forms

Is SMS dead? It seems that in a world of instant messaging and emails, the old text message has had its day. However, research shows that SMS certainly has a place for businesses and their customers. Statistics show that the open rates of SMS messages are far higher than that of emails.

Just think, how many emails do you see a day and how many do you just ignore and delete? Can you say the same about SMS message? With fewer text messages coming through, you're much more likely to pay attention when one does ping on your phone. That's a golden opportunity for businesses to stand out.

Plus, in some scenarios, sending automated texts is more effective than emails for auto-responses anyway. For example, if you book an appointment somewhere, many businesses will send a confirmation or reminder SMS of the booking.

Of course there isn't someone sitting there sending out hundreds of text messages a day. So, how do you automate this process and save time? You may be looking for SMS schedulers or a specific WordPress plugin to handle it all for you, but there is a simpler, neater option.

Linking SMS messages to your website forms is a simple solution that requires very little set up. In this post, we'll show you how to do it with Formidable Forms.

To set this all up, we will be using the Twilio WordPress SMS plugin. Our add-on will connect your WordPress forms to Twilio so you can send and receive SMS messages related to certain form actions.

Before we get started, you’ll need a current Formidable Forms Pro license and an account with Twilio.

Step 1 – Activate the Twilio SMS plugin for WordPress

In your Wordpress admin area, start by going to ‘Formidable’ > ‘Add-ons’. There you’ll find an option for the Twilio plugin. Simply click ‘Install’ and you’re ready to go.

Step 2 – Set Twilio up

Once you’ve activated the plugin, it’s time to set it up and make adjustments. Go to ‘Formidable’ > ‘Global Settings’ and find the ‘Twilio’ tab.

Here, you’ll need to insert your Twilio Account SID and Auth Token. You can find these on your Twilio account page. However, if you’re using a trial version, you must also verify the number you’re sending messages to first.

Twilio Global Settings

Step 3 – Connect Twilio to Wordpress form submissions

To set up SMS messages as an auto-response to form submissions, you’ll need to first create the form you will be using for this.

When you create a form, you’ll need to include a Phone Number field. Users will then be able to input their phone number and receive an automated SMS message once they’ve submitted the form.

Next, go to your form ‘Settings’ and click on ‘Form Actions’. You will see a series of icons for add-ons to include in your form. Click on the phone icon, as shown below:

Twilio New Action

To make things easier, give your Twilio action a Label. This will only be visible to those with access to the back-end of your website, it's just for easy reference.

Step 4 – Set your ‘To’ and ‘From’ fields

In your options, you should see a ‘To’ box. In this box, insert the Phone Number field ID. This will link to the Phone Number Field you added to the form earlier. Alternatively, you can enter specific phone numbers, but if adding multiple ones, you’ll need to separate them with a comma. In this case, a separate text will be sent to each phone number included.

Twilio To Box

In the ‘From’ box, you’ll need to insert your Twilio phone number. Be aware that if you’re using an international number, you’ll need to include your international code too.

Twilio From Number

Step 5 – Compose your SMS message

Next up is to add the message you want your recipients to receive in the Message box.

It’s entirely up to you what you want to include here. An example could be ‘Thanks for submitting an application' or 'Your booking has been confirmed'.

Twilio Message Box

Step 6 – Use conditional logic

Once you’ve composed your message, it’s time to apply conditional logic to tie everything together.

Scroll down and find the ‘Trigger this action after’ option. This should have a dropdown box with a few options, as shown below. Depending on what add-ons you have activated, different triggers may appear.

Twilio Trigger Action After

Here’s what each of those options mean:

‘Create’ - This will send a text when a user submits a form

‘Update’ - This will send a text when a form entry is updated

‘Delete’ - This will send a text when a form entry is deleted

If you want to send a text once a form has been submitted, click ‘Create’.

Next, click ‘Use Conditional Logic’. Here is where you will tell the plugin what to do when this form is submitted. For example, you could send a text message, only if the user agrees and ticks 'Yes’ on a checkbox.

Read our post on how to add a signup checkbox to a form. In that post, rather than linking it to MailChimp, you can just set up a checkbox option labelled something like ‘Do you want to receive a SMS response?’.

Twilio Conditional Logic

When you’re happy with everything, click ‘Update’. You should now have a fully functioning SMS auto-response system for your form submissions. When SMS is built into your forms, it will be a nice touch for those looking to make an impression with new customers. They will appreciate the more personal feel than the typical mass email that we’re all used to these days.

What else can you do with the Twilio SMS plugin?

Schedule SMS messages for later (optional)

Don't want to send SMS messages right away? You can also schedule them for a later date by using our Scheduled Autoresponders add-on. For example, you may wish to add a personal touch to your client relationship by scheduling birthday SMS messages or appointment reminders. Clients will appreciate these gestures as they go above and beyond what they've signed up for.

Set up automated conversations (optional)

If you wish to receive SMS responses to your Twilio number, it helps to have an automated message set up to save you from manually responding to each one. With our Twilio add-on, you can set up conditional responses, based on the contents of the text. That way you barely even have to think about it.

Set up text voting (optional)

Do you want to set up text voting with your community? Setting up GUI-less submissions means you can allow anyone to text in votes to your forms. Users won't have to take time out to visit your site. They can send responses directly from their phones. This boosts conversions because it's minimal effort for them. To do this, you can follow our instructions in the documentation.

We hope this has helped you do more with your WordPress forms. We've got plenty of new things for you to try out on your website, with our range of intuitive features. Not yet using Formidable Pro? Upgrade in just a few clicks to get access to a wide range of additional features and add-ons!

The post How to Send SMS Text Messages from Your WordPress Forms appeared first on Formidable Forms.

How to Create a Mobile WordPress Form that Converts

$
0
0

Want your forms to be more accessible? Optimizing for mobile is an essential step for any modern business website. We'll show you how to create a mobile WordPress form.

How to Create a Mobile WordPress Form that converts

Building forms in WordPress can be really simple, with a tool like Formidable Forms. However, if you want the best for your WordPress site, there's a little more to it than downloading a WordPress forms plugin and throwing up a form.

Why should WordPress forms be mobile-friendly?

Placing a simple form on your website isn’t enough these days. Not if you want to boost conversions and really make your forms effective in growing your business.

Whether you rely on simple contact forms, email newsletter signup forms, order forms, online registration forms or job application forms, you can't be too careful. Form conversion rates are often directly tied to your business success so you need to think carefully about how well they function.

More and more people use their smartphones to browse the web and many of them will buy from or sign up to websites through this method. While most people still fill in forms on desktop computers, there is a growing market for mobile users and it makes sense to cater for them as well.

If your forms don’t work well on mobile, you can’t count on those mobile users to move over to a desktop computer to finish what they started. Some may, but a lot won’t and that means you miss out on those people. It could mean fewer customers, fewer results in a survey or lower email signup numbers.

Can you really afford to miss out on all that?

Probably not, but the good news is you don’t have to. Creating a mobile WordPress form is really simple and we’re here to help you get started with it.

How can I make my mobile forms look great and work beautifully?

The great thing about using Formidable Forms is that all our forms are designed to be mobile-friendly and to shrink down to any sized device.

We know that there’s no such thing as one size fits all these days, and never wanted our forms to become difficult to adapt.

Whether you build a form from scratch or use one of our templates, our handy drag and drop interface makes building web forms easier than you think.

However, we do have some pointers on how to get the best out of your forms to encourage full form submissions and higher conversions. Take a look at our top tips below:

Tip 1: Divide long forms or avoid them altogether

When you’re on a smartphone there are lots of little distractions, which can all lead to form abandonment.

One way to solve this is to have a long form split into multiple pages. Ideally, you can then save your progress and pick the rest of the form up later. A progress bar is also really useful for long forms. This will show the user how far into the form they are.

That’s only if you really need a long form. Ideally, they should be avoided unless necessary. Try to get your form onto a single page if you can.

Tip 2: Avoid hover-over functionality

Having information available through hover functionality can be a nice way to keep your forms neat and tidy. However, this functionality doesn’t usually translate well to mobile devices. Without a mouse, it’s not always possible to see hover content.

You could remedy this by offering a way to click on the content, so it expands and shows the information you need. Alternatively, you could just have the additional information present on the screen already.

Tip 3: Make the next steps simple

If you end your mobile WordPress form with a Call to Action (CTA) in the form of a link or a button, make sure the next step you’re asking them to complete is simple. The more friction in between submitting your form and the next step, the more chances you’ll lose users along the way.

Tip 4: Choose form fields that are easy to use on mobile

If you use a lot of checkboxes, consider how easy or difficult they are to use on mobile. Is there danger that users could frequently click the wrong one? That frustration can lead to them abandoning the form pretty quickly. It's always best to check things like this on mobile devices to see if there are any problems you've missed when designing your form.

Instead, make sure checkboxes are easy to select or even play around with toggle or slider fields. These different types of fields give the form more variety and might be an easier way to get responses from mobile users.

Build easy-to-use, mobile-friendly, responsive WordPress forms

Overall, it's important to try and walk through the customer experience, both on desktop and mobile. Imagine you are a user. Ask yourself:

  • Could this section be shortened?
  • Could this be made easier?
  • Does this look just as professional and functional for mobile as it is on desktop?

If you follow the above tips and carefully consider how your mobile forms operate, you could definitely see more conversions from mobile users.

If you really want to impress mobile users, you could send an automatic SMS response after a form is filled in. This might be better than sending an email to confirm registrations or appointments. This saves the user from having to open their email app. They get the notification right there and then on their mobile device.

We hope you've found these tips on creating a mobile WordPress form helpful. If you're not already a Formidable Forms user, there are plenty more intuitive form builder features to go alongside our mobile-friendly WordPress forms.

The post How to Create a Mobile WordPress Form that Converts appeared first on Formidable Forms.


How to Accept PayPal Payments in Your WordPress Forms

$
0
0

Are you looking for a way to start accepting PayPal payments on your WordPress forms? Getting set up is really simple and in this post we'll show you how

How to Accept PayPal Payments in Your WordPress Forms

Taking payments on your website is probably something you’re eager to learn more about. What business wouldn’t prioritize that?

Collecting payments online is a much simpler, convenient method of getting paid. You can save all that time spent recording manual transactions and chasing people up for payments. By linking your website with an established payment processor, you are increasing your potential for growth.

Being able to pay online is much simpler for the customer too. All they need to do is enter their details and away it goes. It gives them potentially faster access to your products or services. It’s a win-win. No customers will be scared away by a lack of an online payment option.

Why use PayPal for WordPress payment forms?

PayPal is a huge name that’s instantly recognizable and trusted by 277 million users worldwide.

According to their research, 54% of people are more likely to buy from a business that provides PayPal as a method of payment.

Having PayPal on your website can set your customers’ minds at ease as they know their payments will be handled safely.

It also gives you peace of mind because it makes payments easier to collect by a trusted name, without concerns about PCI compliance.

In today’s post, we’ll be taking you through the step by step process of accepting PayPal payments on your website, with the help of Formidable Forms.

How to use PayPal with Formidable Forms

We have a PayPal forms plugin that allows you to accept payments via PayPal on your WordPress website.

With it, you’ll be able to collect instant payments from your customers after a form is submitted. They don’t even need a PayPal account to do it in many cases. All you need is a Formidable form that redirects to a PayPal payment page. From there, your customers can choose to use their own PayPal account or just a credit card.

You can set up recurring subscription payments if you need to or just one-off payments.

You can also use conditional logic with your PayPal forms. That way, you can send customers to PayPal, only if they make certain selections in the form. For example, you can ask the customer whether they want to pay at a later date by check or if they want to head straight over to PayPal to make the payment.

Step 1 - Download and install the PayPal forms plugin in WordPress

First of all, you’ll need to go to your WordPress admin area and click on ‘Formidable’ on the left and then ‘Add-ons’. Simply find the Paypal forms plugin and click ‘Install’.

Step 2 – Set up the PayPal plugin

The next thing you’ll need to do is integrate PayPal with Formidable Forms. You’ll need to have a PayPal account already set up for this bit.

Go to ‘Formidable’ and then ‘Global Settings’. You should see a ‘PayPal’ tab, click on this.

Enter your PayPal email address and update any other settings you need. If you’re installing this on a website that is already live, you’ll need to set your ‘PayPal environment’ to ‘Live’.

PayPal forms plugin Global Settings

Step 3 - Set up instant payment notifications

This part is really important in order to ensure that collected payments get correctly marked as paid. You’ll need to configure your PayPal account to send payment notifications.

To do this, follow the steps below:

  1. Log into PayPal and go to your ‘Profile’ and then ‘Profile and Settings’.
  2. Click on ‘My Selling Tools’
  3. Scroll down to find the section ‘Getting paid and managing my risk’
  4. Find ‘Instant Payment Notifications’ and click ‘Update’
  5. Enter a notification URL. It doesn’t really matter what URL you put through as Formidable will override this anyway.
  6. Click ‘Receive IPN messages (Enabled)’ and ‘Save’

PayPal IPN

Step 4 – Set your form to accept PayPal payments

Once you’ve followed the steps above, it’s time to set up a form that will collect the payments. You can choose a WordPress order form you already have, or you can create the form you wish to use. Once you've got a form, simply follow the steps below:

  1. Click on form ‘Settings’ > ‘Form Actions’ and ‘PayPal’ PayPal form action Icon to add PayPal to website
  2. Label your PayPal form action for easy reference (you’ll only see this on the back-end)
  3. Create your ‘Item Name’. You can type in a product name or you can set it to change depending on the user’s selection.
  4. Enter the PayPal email address associated with your account.
  5. Set the amount for the payment. This can be from a field in your form or a set amount.PayPal form to collect payments Amount
  6. Set the payment type to either a one-time payment, a donation or a subscription.
  7. Select the currency
  8. Click ‘Update’ so all your settings can be saved.

Step 5 – Set up recurring payments (optional)

PayPal forms Payment Type

As you may have seen above, there is an option to select 'Payment Type. If you know you’ll need to set up recurring payments, like a membership system, you’ll need to switch this to 'Subscription'.

You can then set the ‘Repeat Every’ value to however often you wish to set up the recurring bill for. You can even choose to include a trial period where the customer won’t get billed for the first subscription. Offering a free trial is always a great method to get new people to sign up.

Step 6 – Trigger an action after payment is complete

When payment has been completed, it’s time for you to choose the next step for your new customer. You can choose to send a notification email or invoice, subscribe a user to your email list, send a SMS or add a user to your registration list.

  1. Go to form ‘Settings’ and ‘Form Actions’. Open the type of action you would like to trigger.
  2. Scroll down to 'Action Triggers' and select ‘Trigger this action after PayPal payment’.
  3. Click Update

PayPal form Trigger PayPal
That’s the basics all covered. For even more customization, take a look at our full set of step by step instructions for each option in our documentation.

Want to offer more than one payment option? Doing so gives your users more choice to pick the one most suitable for them. Read our post on How to Add Optional Online Payment Processing to WordPress Forms.

If you're not already using Formidable Forms, take a look at the many ways our WordPress form builder can help you build effective, conversion-driven forms for your WordPress site.

The post How to Accept PayPal Payments in Your WordPress Forms appeared first on Formidable Forms.

How to Use Hubspot with WordPress Forms

$
0
0

Looking for a way to revamp the way you handle customer relations and sales in your business? HubSpot and Formidable Forms are here to help.

How to use Hubspot with WordPress forms

HubSpot is a fantastic tool that many Formidable users benefit from. They currently have over 56,500 business users worldwide looking to take control of customer relations.

With HubSpot, you can easily track and manage new leads and current customers. HubSpot keeps all your client correspondence in one place and automates tasks typically done by your sales team to boost overall efficiency and potential conversions.

As this is so popular, we created an add-on that would allow users to link HubSpot with Formidable Forms and WordPress. Our HubSpot WordPress forms plugin makes it easy to using these two apps together.

In today’s post, we want to share with you our step by step guide on how to use HubSpot with WordPress Forms, specifically how it can integrate with Formidable Forms. It's really easy to set up, so keep on reading to help you get more out of your forms and improve the way you handle customers and leads.

Step 1 – Install the HubSpot WordPress forms plugin

The first step is to install our HubSpot plugin which will help us gain access to your HubSpot account.

To do this, you’ll need to head over to your WordPress dashboard and click on ‘Formidable’ and then ‘Add-ons’. Find "HubSpot" in the add-ons list and click on ‘Install’.

Step 2 – Activate HubSpot

Now that HubSpot is installed, you need to generate an API key that will properly link the two apps. To find your API key, you’ll need to log into your HubSpot account and click on your account name in the top right hand corner. Find ‘Integrations’ and click on that too.

In the left sidebar, go to ‘Integrations’ and ‘API key’. If this is the first time you’ve used an API key for HubSpot, you’ll first need to click ‘Generate API key’.

hubspot api key for wordpress

If you’ve already got a key there, click ‘Show key’ to display it. All you have to do is copy this key and head back to WordPress.

In WordPress, go to ‘Formidable’, then ‘Global Settings’ and find the HubSpot tab.

hubspot global settings

You should see a box to paste your API key. Make sure you click ‘Update Options’ and now you’re all ready to start building HubSpot forms!

Step 3 – Set up the HubSpot form settings

Once your HubSpot account is linked to your WordPress site, it’s time to start building HubSpot forms.

  • First of all, you’ll need a form. You can either create a new WordPress contact form to add contacts or use one you have already.
  • Next, edit the form and go to ‘Settings’ and ‘Form Actions’. Find the HubSpot icon and click it

add form action hubspot

  • This will pull up mapping settings for your HubSpot form. Our HubSpot plugin will automatically fetch all your HubSpot fields to match up with your form fields on the left. Match each HubSpot field to the fields in your form.
  • Save your changes and submit an entry in your form to test it out. This should now show a new contact in HubSpot.

There you have it, three easy steps to get you all set up with HubSpot. Now, when a user submits a form, you won't have to manually copy that information over and put it in HubSpot's CRM. All your new WordPress form submissions will automatically add new contacts to your HubSpot account.

You can use this integration to further improve the way you handle customer relations and manage your sales process. Your sales team will thank you for setting such a simple solution up!

Want to attract more users to fill in your forms? Make better use of your HubSpot form by placing it in a sidebar, footer or a popup modal to increase form conversions.

If you're not already using Formidable Forms, find out why it's the best WordPress form plugin. Look at our range of form builder features, including our wonderful drag and drop form builder.

The post How to Use Hubspot with WordPress Forms appeared first on Formidable Forms.

How to Add an Image to a WordPress Form to Increase Engagement

$
0
0

Are your WordPress forms not converting? We've got a really simple solution for you to try which will increase engagement in your forms.

How to Add an Image to a WordPress Form to Increase Engagement

Once you've built your forms, the next important step is to actually get people filling them in. This is the hardest part and many business owners find themselves wondering why no one is. If you're also wondering how to increase engagement and form conversion rates, we've got a really simple idea for you to try out.

One of the ways you can increase engagement to your contact or user registration forms is to make your forms more visually appealing.

The power of images in WordPress forms

Images catch people's attention far more effectively than plain text ever will. Anything you can do to catch the eye and persuade people to fill in your forms can only mean good things for your conversion rates.

Research from HubSpot found that when images are used, there is a 37% increase in engagement with your posts, forms, social media content and so on. They also found that 40% are more likely to give favorable responses too. This is definitely worth bearing in mind if you want to use surveys or customer feedback forms.

Besides improving the visual appearance of your forms, images can be used in many other ways.

Adding an image to WordPress Forms can:

insert images as radio buttons

How to add images to your WordPress forms

Formidable Forms' online form builder is open to all kinds of customization to ensure that your forms are exactly how you want them to look.

That means you can add images wherever you want. It could be at the top of a survey to draw attention, you could images throughout your form to break up or you could make images interactive to make your forms more enjoyable to complete.

Now we’ve covered the reasons why images do so well in forms and on websites in general, let’s go through how to add an image to your Wordpress forms.

Step 1 – Get started with a WordPress form

First of all, you'll need to build the form you would like to upload the image to.

You can either choose one of our templates such as a contact form or registration form or build your own simple form from scratch.

If you've already got a form you'd like to add an image to, you can simply pull that up and start editing it.

Once you’re happy with your form so far, save your progress and move onto the next step.

Step 2 – Add a new page or post

Stepping away from your form for one minute, go to your WordPress dashboard and select either a post or a page and ‘Add new’.

Why do you have to create a page when you've already built a form?

This will only be a temporary page that you can delete afterwards. We'll show you what it's used for in the next step.

Simply upload the image to your WordPress media library and insert the image into the page or post. When you do this, you can also add in Alt text which will appear in the code.

Step 3 – Grab the image HTML

Now what?

The reason we’re asking you to do this is so we can pull the HTML code for this image and then use it in our form. This is the simplest way to do it and should only take a few minutes.

The next step depends on what editor you have, Classic or Gutenberg.

For the Classic editor, you'll want to open the 'Text' tab at the top right of your content box to view the HTML. This will show the image in HTML form rather than visual.

get image html code

For the Gutenberg editor, you can click on the icon with 3 vertical dots in the block with your image in. Find the option to 'Edit as HTML' and you should get the code for it here.

add image with gutenberg

In either case, you won't need to copy the whole piece of code. You’ll only have to copy the bit that looks something like the example below.

<img src=”[your website URL]/wp-content/uploads/2019/05/[your image].jpg” alt=”[your alt text]” class=”wp-image-500"/>

The bits in italics will instead show your own details so your code will look different to this, but it gives you an idea.

Step 4 – Add the image to your WordPress form

Once you’ve copied the code for your image, it’s time to head back over to your form. In the list of field types you can add to your form, you should see an option for 'HTML'.

add html field

Click to add or drag this to your form in whatever position you want it. Select the field and this should pull up the field options where you’ll find a space to paste your HTML into.

insert image html to form

Click ‘Save’ once you’re happy with it.

Step 5 – Publish your form to on a page, post or widget

Now, all that’s left is to publish your form wherever you want it.

You can publish a form on a page, blog post or through the sidebar or footer. You can publish it in more than one place too.

To add it to a page, for example a contact page, follow the steps below.

Go to ‘Pages’ and ‘Add new’ to create a contact form page, or simply open the one you already have if you’ve previously made one.

If you’re using Gutenberg, you’ll need to add a new block as a widget. Click on Formidable Forms and this should give you a dropdown list of all the forms you have. Select the one you want, with the image in and your form will appear on the page.

add formidable forms gutenberg block to page

For those using the Classic editor, all you need to do is click ‘Forms’ at the top of your content editor box. This will make a popup appear, where you can select the form you want and click ’Add Form’.

insert formidable form on classic editor

Happy? Now it’s ready to publish!

If you want to make better use of your new and improved contact or file upload form, you can also place it in a sidebar to improve visibility. Follow our simple steps on our post How to Add a Contact Form to a WordPress Sidebar.

We hope this step by step guide on how to add images to WordPress forms has helped you do more with your forms to increase engagement and conversions. Adding an image can be just the thing to draw the eye in a sidebar and encourage people to signup.

Not yet using Formidable Forms? Learn more about how we have the best online form builder features or let's go ahead and get started!

The post How to Add an Image to a WordPress Form to Increase Engagement appeared first on Formidable Forms.

How to Create a WordPress Form with File Uploads

$
0
0

Need to accept file uploads in your WordPress forms? We'll show you how easy it is.

How to Accept File Uploads to WordPress Forms

There are plenty of good reasons to accept file uploads and user-submitted content on your WordPress site. It allows users to provide vital information to go alongside a form.

For example, if you were to host a photo competition that needed photo submissions, you'd need a way for users to upload them. It'd be handy to accept file uploads directly in the form when they submit their application.

Maybe you're looking to accept job applications. Give applicants the option to upload their resume or certifications in the application form.

The best way to start accepting files like this is to make it easy to directly submit files through your WordPress forms.

Why accept file uploads through WordPress forms?

Do need to collect files from clients and have been relying on emails? There is a better way!

Sending a separate email with file attachments isn't ideal. This is pretty time-consuming and inconvenient (two words you don't want associated with your business).

So, when a user submits a resume, photo, image or a guest post, don't make them leave your website to do it.

Ideally, you want to keep people on your website as long as possible. You'll want them reading your blog posts, shopping online or learning more about your services. Encouraging people to invest their time in your website first is the best way you can boost website conversion rates.

Formidable Forms has a simple solution that you can set up in just a few minutes. Our WordPress front-end file uploader lets your users upload files and photos to your online forms in seconds.

Drag and drop file upload form

Step 1 - Create a WordPress form for file uploads

If you haven't yet, install and activate Formidable Forms Pro. Don't have a license yet? You can sign up in just a few minutes to unlock tons of fantastic benefits of using our WordPress forms plugin.

Got everything all set up? The first thing to do is start building the form you want to use to accept file uploads.

To do this, you will need to go to 'Formidable' in your WordPress dashboard. Click on 'Forms' and 'Add New'. This will pull up a few options to choose from. You can either start with a blank form or with one of our form templates. Looking to accept job applications? User profiles with a photo? We've got a template just for you.

create a new file upload form

Already have a form for collecting file uploads? All you need to do is load up the form you want to use in the form builder. To do this, instead of clicking on 'Add New', find the form you want to use under 'Forms' and click on the form title.

Step 2 - Add a file upload field to your WordPress form

Once you've built your form, add a File Upload field. We've made our form builder simple, so it will only take a minute.

Our drag and drop design means you can add or remove any field you want from your form. In this case, you'll need to add a field called 'File Upload'. You can find this in the sidebar list in the 'Add Fields' box under 'Advanced Fields'.

add a file upload field


Just click to add or drag and drop the file upload field into the form, wherever you want it.

file upload field in form

Step 3 - Change the file upload form settings

Once you've built the basic layout of your form, it's time to change the settings so that the file uploader works exactly how you want.

To change all the settings for the file upload field, click on the field in your form. On the left, you should now see your 'Field Options'.

file upload field options

This will pull up plenty of different options ready for you to customize. Don't skip this part! There's a lot of time you could save if you control exactly how the file uploader works.

You can check the option to accept multiple file uploads if you want. This saves a lot of back and forth, as everything can be uploaded in one easy form.

You can also make the form field required so that users can't submit the form without attaching their file. This saves you from dealing with incomplete forms, or even chase up users for the missing information.

There is also the option to change the text displayed for your visitors. For example, you could say something like "Please upload your resume." This ensures the form instructions match your brand and the typical language used throughout your website.

Step 4 - Control the type of file uploads to accept

If you want more control over the type of files you accept, you can customize all this in the Field Options too.

You can specify what type of file extensions you want to automatically reject the ones that don't match. For example, you might only want to accept jpeg file types for photo uploads and not pdfs.

multiple image upload in a file upload form

You can do the same for file size too, by setting a max file size. Do your website a big favor by preventing people from uploading huge files that slow it down.

Alternatively, you can resize files automatically before upload. This saves the user time from having to go away and resize or compress the file to try another upload. It also saves you from resizing photos or compressing files on your end.

If you want to keep your WordPress media library clean, select the option to delete files whenever an entry is changed or deleted. This saves you from having to manually clean up the library and makes the uploaded files easier to find.

These customization options are entirely up to you so take a look through them and choose the best ones for you. You can potentially save yourself a lot of bother by specifying exactly what type of files you want to accept.

Step 5 - Save and publish your WordPress file upload form

Happy that your file upload form is tailored closely to your needs? It's time to save your progress and publish the form on your WordPress website.

This could be on a special landing page, a post or page or in a WordPress sidebar if you want to catch visitors' attention.

Creating a WordPress form with file uploads is just as easy as it looks. In no time at all, you could be accepting uploads for client designs, job applications, guest blog posts or photo submissions. This frees up your time to spend on the submissions and whatever you want to do with them.

No more time wasted trying to get people to submit the right kind of files. No more finding files lost in a heap of emails. Everything is uploaded to one place, on your WordPress site through your WordPress form file uploader.

Read More: 6 Options to Look for in a WordPress File Upload Form

Want to expand into more user-submitted content? With Formidable, it's so simple to accept user submitted posts and pages as well as file uploads for sharing in your WordPress forms. You can even give your users the option to edit their submitted posts with our front end editor.

Not currently a Formidable Forms user? Our WordPress front-end uploader is included in the core Formidable Forms Pro plugin and is one of our most popular features. It's such a simple solution that will save you so much time and hassle.

Read more about how Formidable Forms has the best features of any WordPress form builder plugin.

The post How to Create a WordPress Form with File Uploads appeared first on Formidable Forms.

How to Optimize Images to Improve WordPress Site Performance

$
0
0

Are images dragging your website performance down? This post is for you. We'll show you how to properly optimize images for WordPress.

How to Optimize Images to Improve WordPress Site Performance

It's probably no surprise to learn that having images on your WordPress website can really help with conversions. It doesn't matter whether it's a home page, a landing page or blog posts, images can really help to turn things around.

Read More: How to Add an Image to WordPress Forms

However, there's a bit of a problem when it comes to using images on your website.

The problem with images on your WordPress site

If images on your website can mean good things for your user experience, traffic and conversions, what's the issue?

A lot of images on your site can really slow things down. The simple fact is that images are much larger in size than plain text. This makes it take longer to load than other content.

However, your visitors might not even see your copy, let alone your images if the page loads take too long.

It might not seem like it, but even just a second of loading time can mean all the difference. A study from Akami found that a 2-second delay in website loading time could increase bounce rate by 103%.

People are busy and impatient and are so used to websites loading instantly. When your site doesn't load quickly, at best it gives your new visitor a bad first impression. At worst, they move on quickly and buy from someone else.

Returning users get frustrated each time they arrive on your website and before you know it, they don't come back. They go elsewhere, to another website that performs quickly and how they expect. There are plenty of others to choose from out there.

High bounce rate (the rate at which your users visit your website and then leave without going to another page) can really damage your site's performance. Search engines won't award your website with better rankings if everyone who turns up, leaves within a couple of seconds.

This means less traffic for you in the long run, because your rankings are low. That also means lower conversions for you. If only your website performed quickly, things could be different.

If this sounds familiar, it means that all the hard work you've put in to trying to boost your conversions could go to waste.

What does this mean for your WordPress website?

Does that mean you should avoid or limit the amount of images you include on your website? No, images aren't the problem. How they're optimized (or rather not) is.

There are a few ways you can optimize images for WordPress, which we want to tell you about in this post. With just a few small changes, you could drastically improve your WordPress website's performance and boost conversion rates.

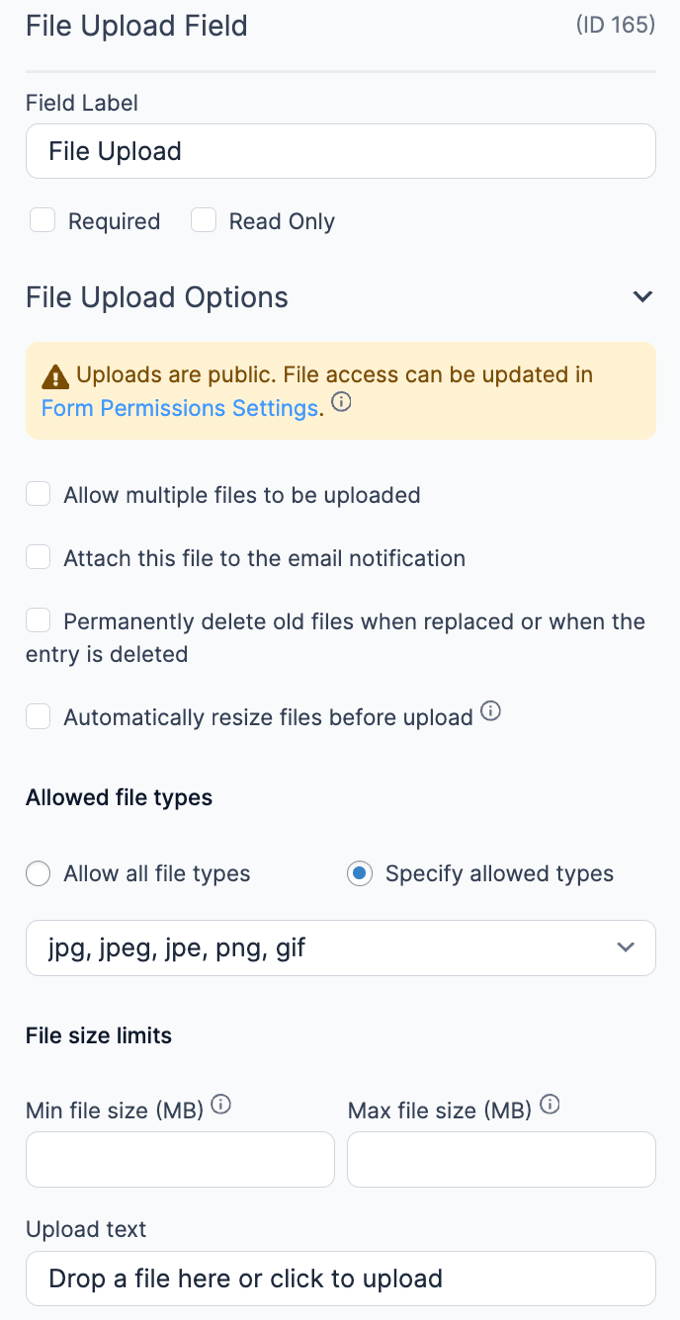
Resize images before uploading

Sometimes the simplest solutions are the best. So we thought we'd start with image resizing. This is the first thing you should check in order to optimize images for WordPress.

This means you will need to change the size of the image before you upload to your WordPress library. There are plenty of third-party tools out there that can help you do this. You could use Windows of Mac tools, Photoshop or Snagit.

There is also a handy resize function in WordPress for images you've already uploaded. All you need to do is click 'Edit Image' on the image in your library. On your right you should see the scale of the image, which you can then alter to reduce the resolution. For example, from 1000px to 950px. All you need to do is save your changes and insert the image.

how to resize images wordpress

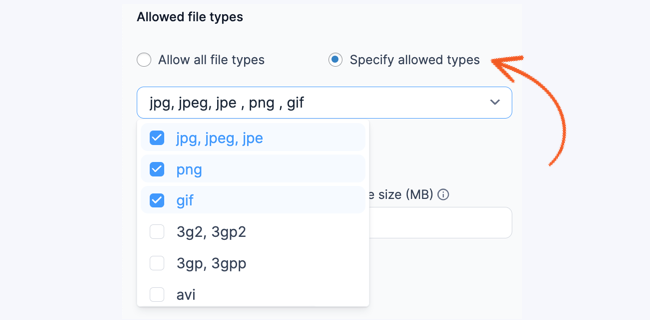
Use an image compression tool

Another way to speed up image loading time is to use compressed images. This is slightly different from just resizing the image which focuses on resolution.

What is image compression?

Image compression is a way of reducing the size of an image in bytes, without compromising on the quality of the image or the resolution. It's a more efficient way of storing or transferring files, for example when loading up a website.

Using a compressed image on your website means that it doesn't need to work as hard to deliver all those bytes to your users, which can really slow things down.

However, there is a little risk that the quality of the image suffers once compression is applied. It's important to use good quality original images in the first place, if you want any hope of them turning out well after they are compressed.

There are plenty of online tools that offer instant image compression and resizing. Many of them will let you choose the rate at which you can compress the image, to give you further control over the final product. A lot of our team use the tool ImageOptim.

In the screenshot below, you'll see an example of a JPEG image that has been compressed too much. Would you be happy with that on your website?

image compression

There's often a balancing act between getting the file size you want and the quality of the image. It may require some playing around and experimentation.

What type of image compression should you use?

It's important to know the difference between compression types.

Lossy compression means removing data to shrink the file size. The downside to this is that your image quality can suffer as a result on the removed data.

Lossless compression, on the other hand, works by shrinking the entire image so that there's no loss of quality. Lossless compression can also be reversed to the original image, whereas lossy compression will permanently remove data.

The type of file you use is also important. In most cases, PNG images will fair better than JPEG images. PNG images are lossless types and JPEGS are lossy, but offer a higher compression rate.

However, JPEGs are usually smaller files than PNG, even without the compression. So, you might not even need to compress it at all, or compress it at a lower rate. This might require some experimentation to find what works best for your images and website.

Install an image optimization plugin for WordPress

Of course, we're always fans of using a handy plugin to solve your problems and this is no different. There are plenty of plugins to download that will resize or compress images you upload into your media library.

There are lots to choose from, WP Smush and EWWW Image Optimizer being some of the most popular and effective ones you can use.

This is really helpful if you're rushed on time and don't have the time to manually resize and compress every image you need to use. When your posts or pages are image heavy, this can take way too much of your time up that you could be spending elsewhere.

Once you've used one or several of these suggestions, you should see a clear improvement in your website's speed. This in turn will help provide a better user experience for website visitors, the kind that will keep them coming back to your website.

It's a simple but huge improvement you can make to your website which will boost rankings and conversions.

Optimizing images for search engines

On the subject of optimizing images for site performance, it wouldn't be right not to mention other types of optimization.

You can also optimize images for search engines to improve your ranking as well as performance. Making a few small adjustments to your images can improve your page or post's effectiveness which can boost your rankings.

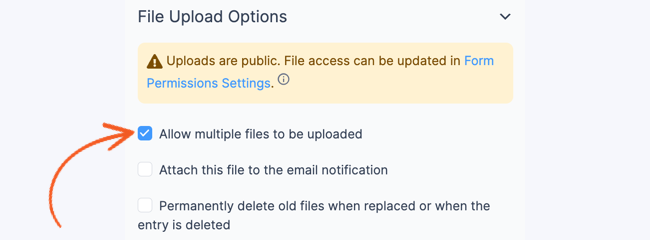
Add alt-text for keywords

The main way you can optimize your images is by making use of the alt-text option for each image. In WordPress you can find that when you insert or edit an image in your media library. There is a little box for you to put a valuable keyword that is relevant to the post or page it's placed on.

how to optimize image with alt text

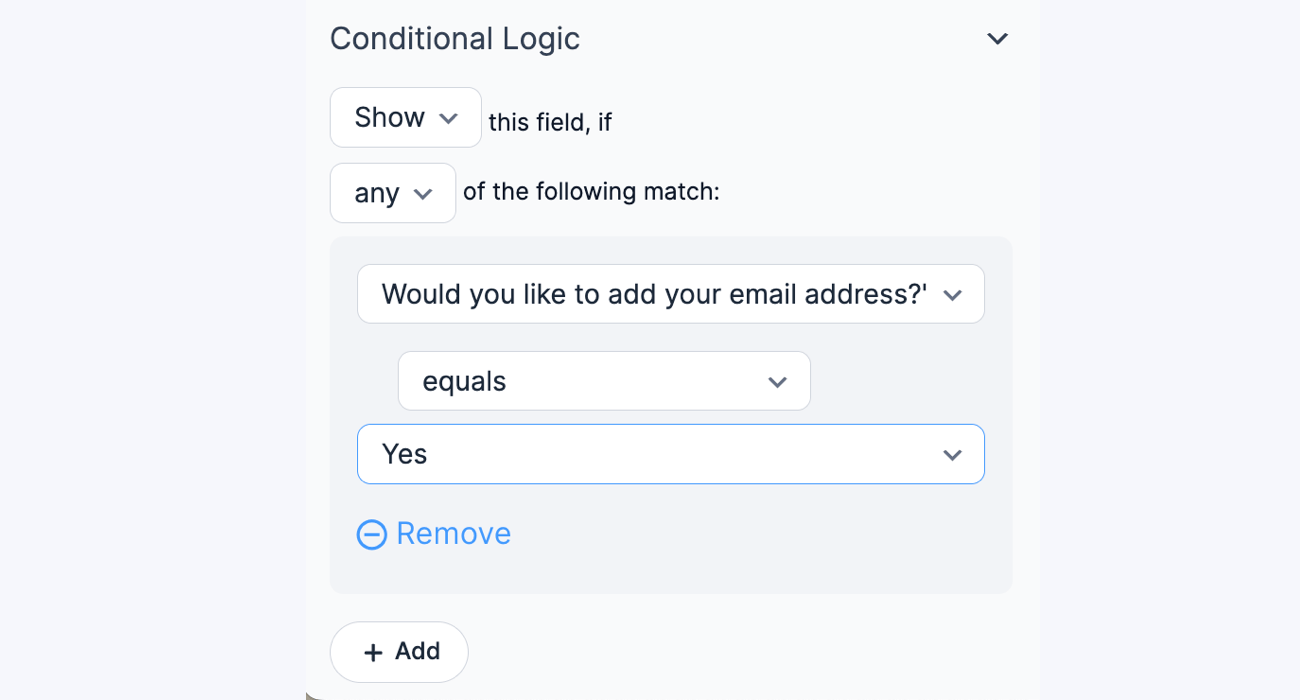
Title tag optimization

Another way to optimize images is to make use of the title text field too. You can find this near the alt-text option, as shown in the screenshot above. Title tags work in a similar way to alt-text tags but they're for the website visitors rather than search engines.

Using title tag optimization is great for screen readers for those who are visually impaired. This not only optimizes your website for search engines, but also improves the accessibility of your website. Doing so can further improve your conversion rates because your website is easier for everyone to access.

Create XML image sitemaps

Finally, XML image sitemaps can help your website further along. Sitemaps work by giving search engines more information about your website and the images on it, so they can better understand where to rank your content. This helps your images get seen by search engines, which will improve their effectiveness.

Creating XML sitemaps sounds complicated but a few WordPress plugins have this already built in. For example, Yoast SEO will create sitemaps for you. There are also other plugins on WordPress you can look for.

How can Formidable Forms help?

We hope these tips on how to optimize images for WordPress have helped. Most of them are fairly small changes that have the potential to be big improvements.

Try to get into the habit of resizing and compressing images wherever necessary to help speed your website up. If you want to improve your website further, invest in a dedicated plugin to help you along or start optimizing for search engines too.

Adding images to your WordPress website and online forms is easy with Formidable Forms. You can display images in contact forms, Views or even open your website up to user-submitted images through our front-end file uploader.

Formidable Forms is an advanced plugin that gives you full control over your forms and how they look. This makes optimizing images within your forms simple and fast.

If you're not already a Formidable Forms user, take a look at our top features that make our plugin the most advanced WordPress form builder around.

The post How to Optimize Images to Improve WordPress Site Performance appeared first on Formidable Forms.

Viewing all 521 articles
Browse latest View live